
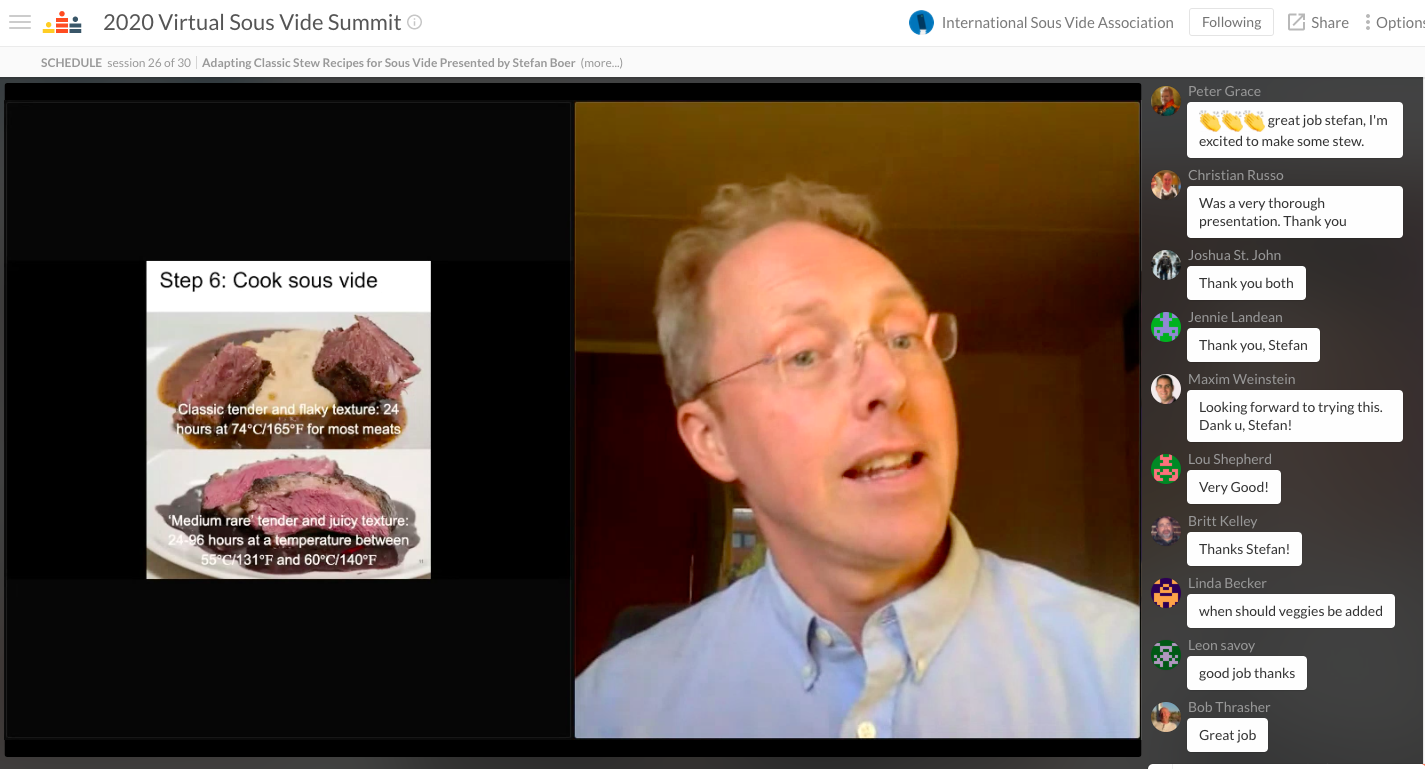
Yesterday I spoke at the Sous Vide Summit of the International Sous Vide Association about how to adapt stew or braise recipes for sous-vide. Because of the pandemic, the conference was held virtually. It was a great conference and if you are interested in sous vide, I would recommend to join the conference next year. This blog post has the same content as my presentation.

Stews and braised dishes are popular all around the world. Here are some examples of sous vide recipes for stews and braised dishes on my blog:
- Italian
- French
- Asian
- Tex-Mex/Mexican
The key elements that make a stew or braised dish so delicious are:
- Browning to add depth of flavor
- Reducing to concentrate flavors and thicken the sauce
- Slow and moist cooking to tenderize tough meat
- Creating a delicious sauce from the juices that are released by the meat
- Blending of flavors
We are not able to produce the first two elements with sous-vide, because the temperature is too low and it is too moist for much browning to occur, and no reduction can happen because all the moisture is trapped in a plastic bag. However, sous-vide is perfect for slow and moist cooking, it captures all the juices that are released by the meat, and the flavors have a lot of time to blend during the long cooking process. So to adapt classic stew recipes for sous-vide, we have to do the browning and reduction outside of the sous-vide process.
You can adapt any classic stew recipe for sous-vide by following these 7 steps:
- Brown the meat
- Make the sauce
- Reduce the sauce
- Optional: cube or grind the meat
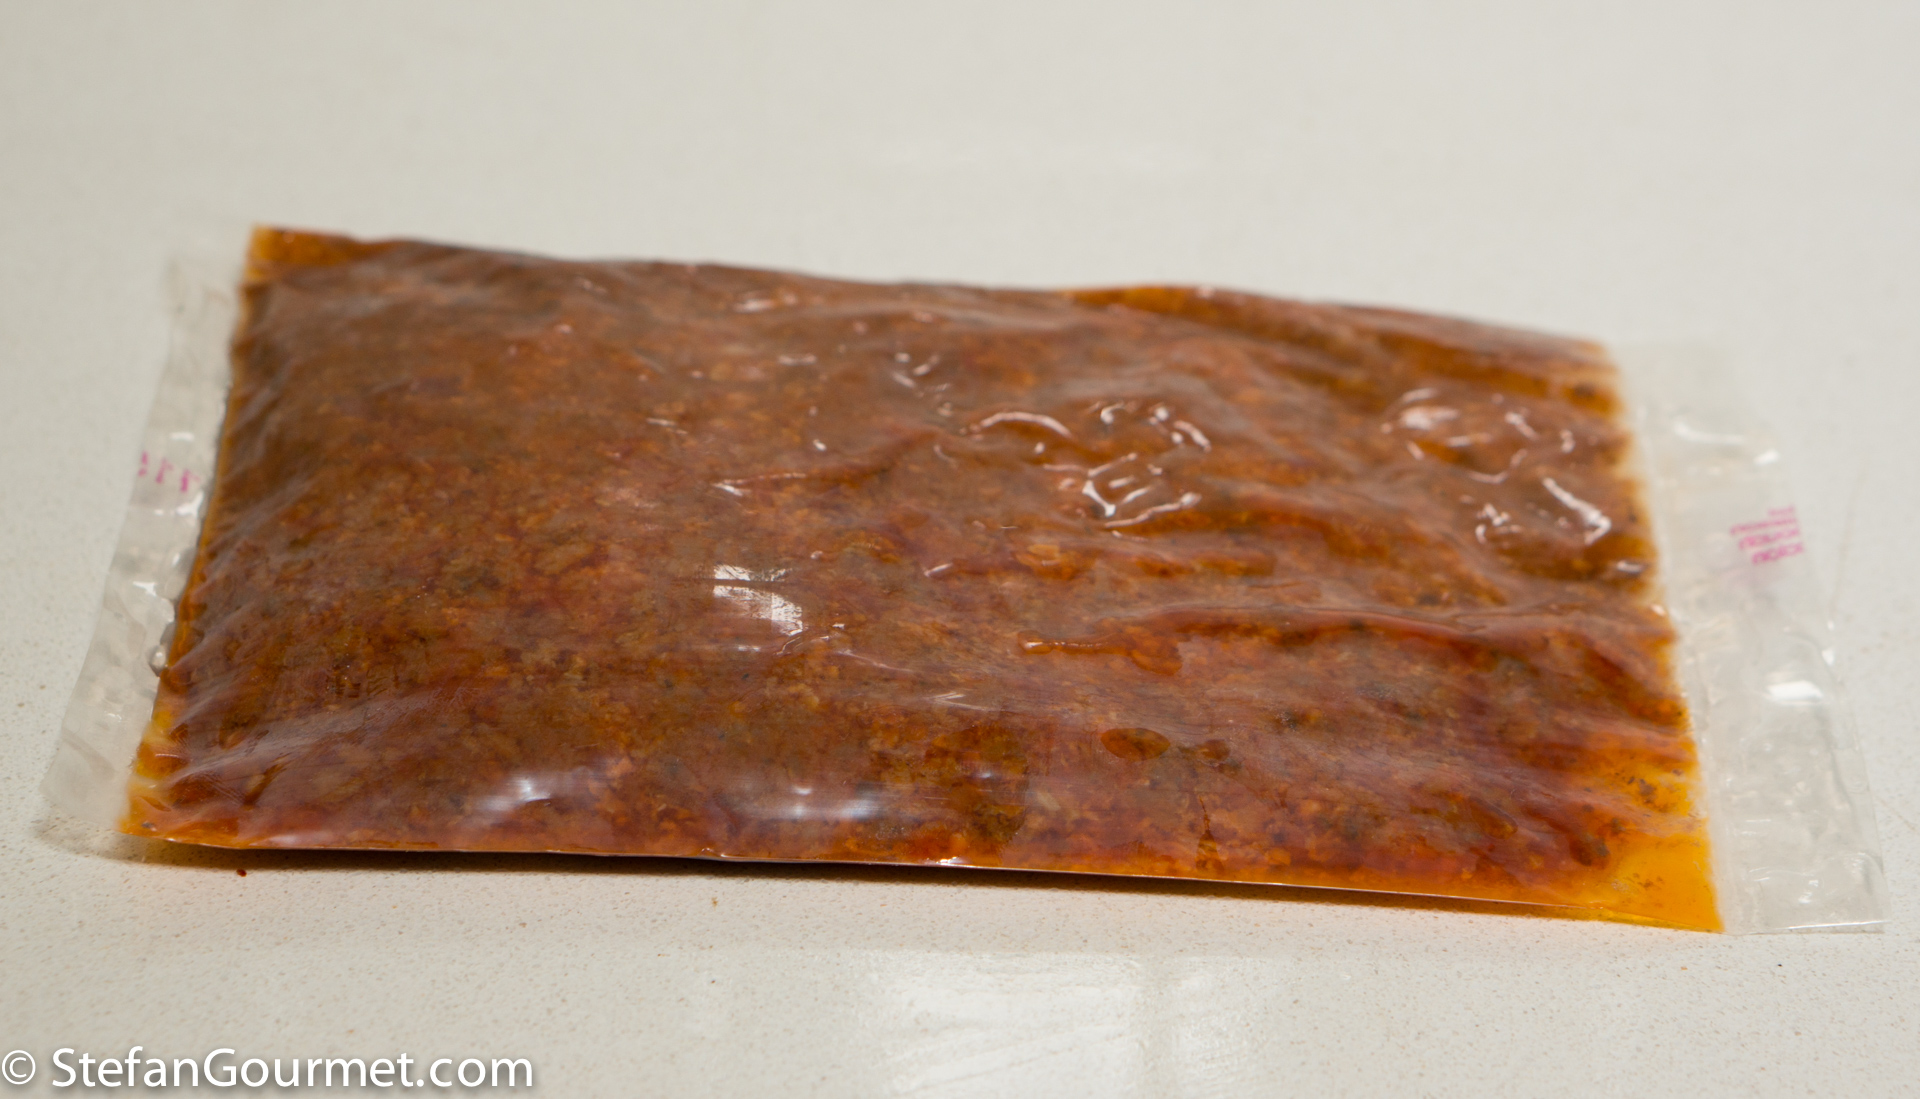
- Vacuum seal meat and sauce
- Cook meat and sauce together sous vide
- Finish and serve
Let’s discuss each step in detail.
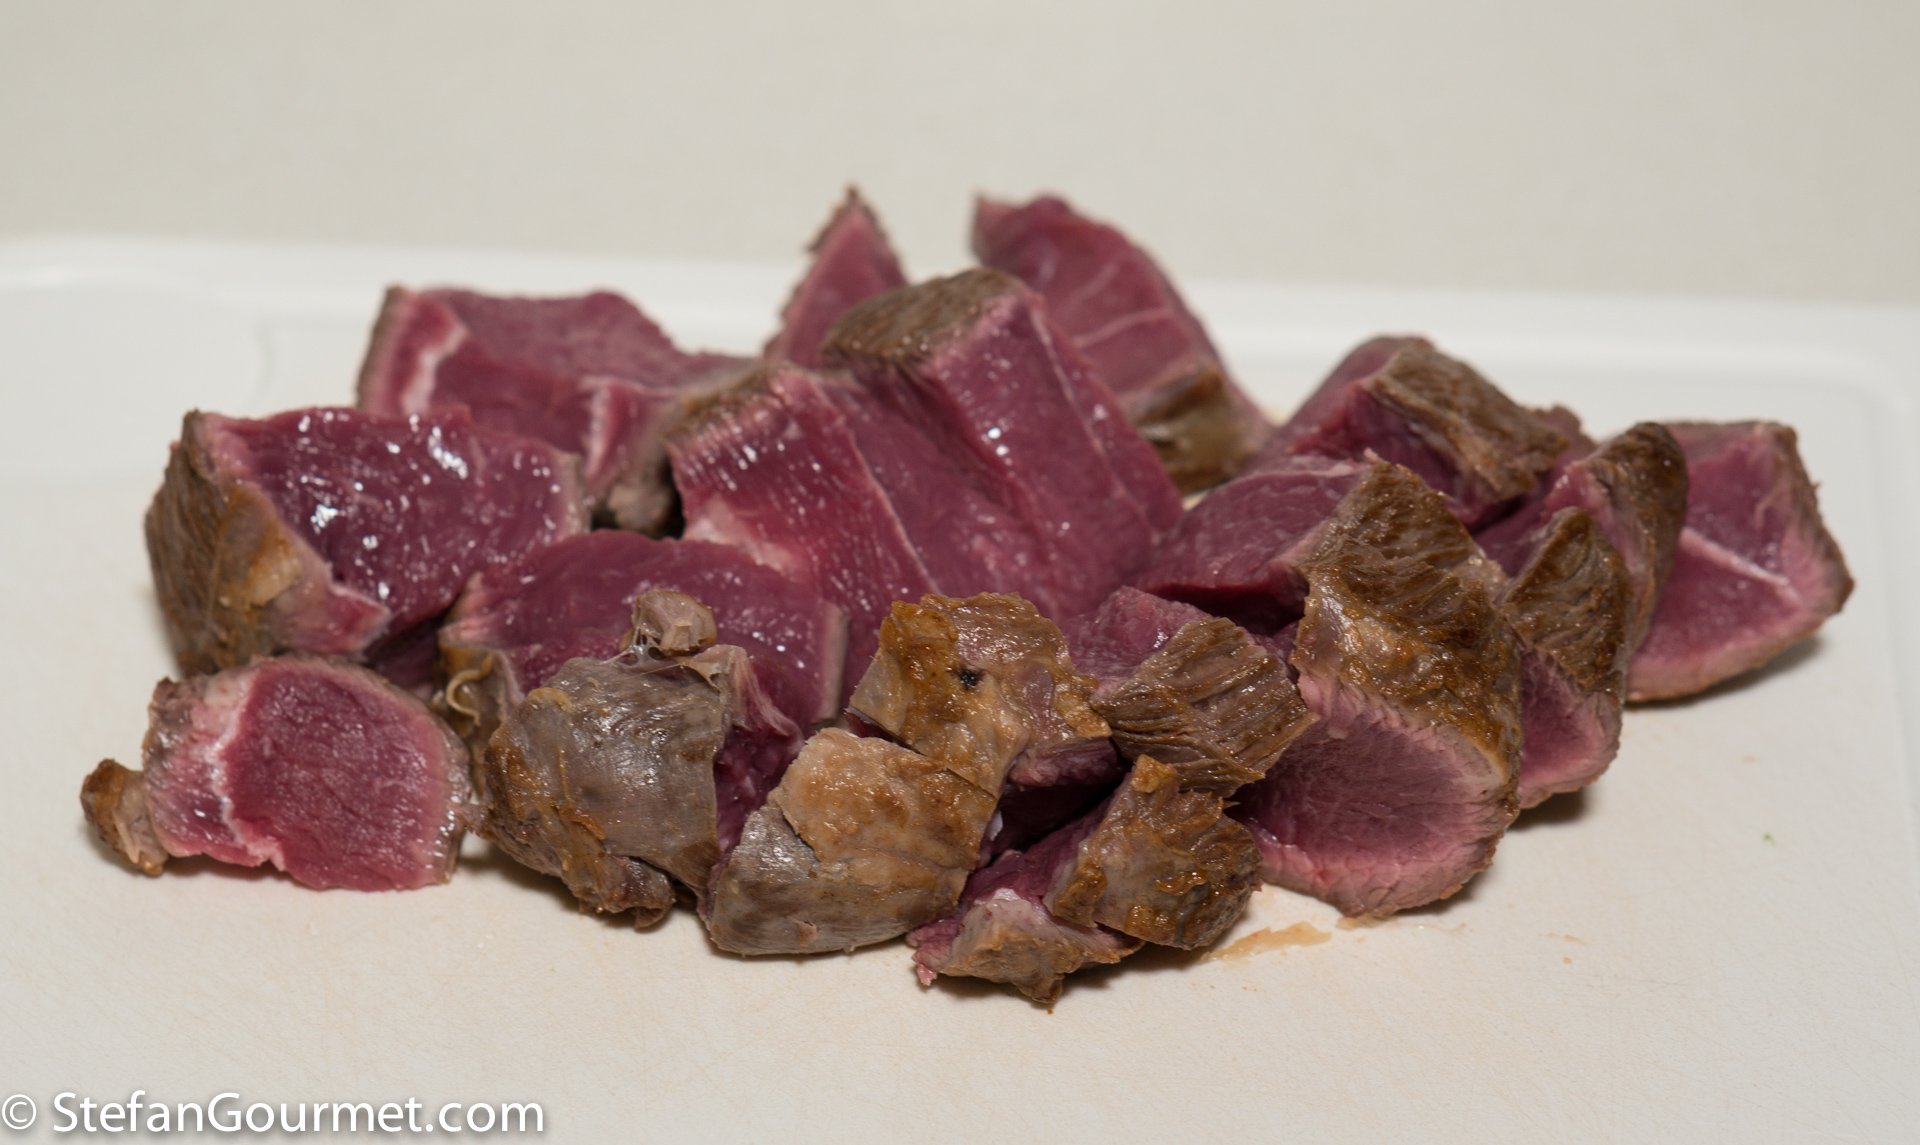
Step 1: Brown the meat
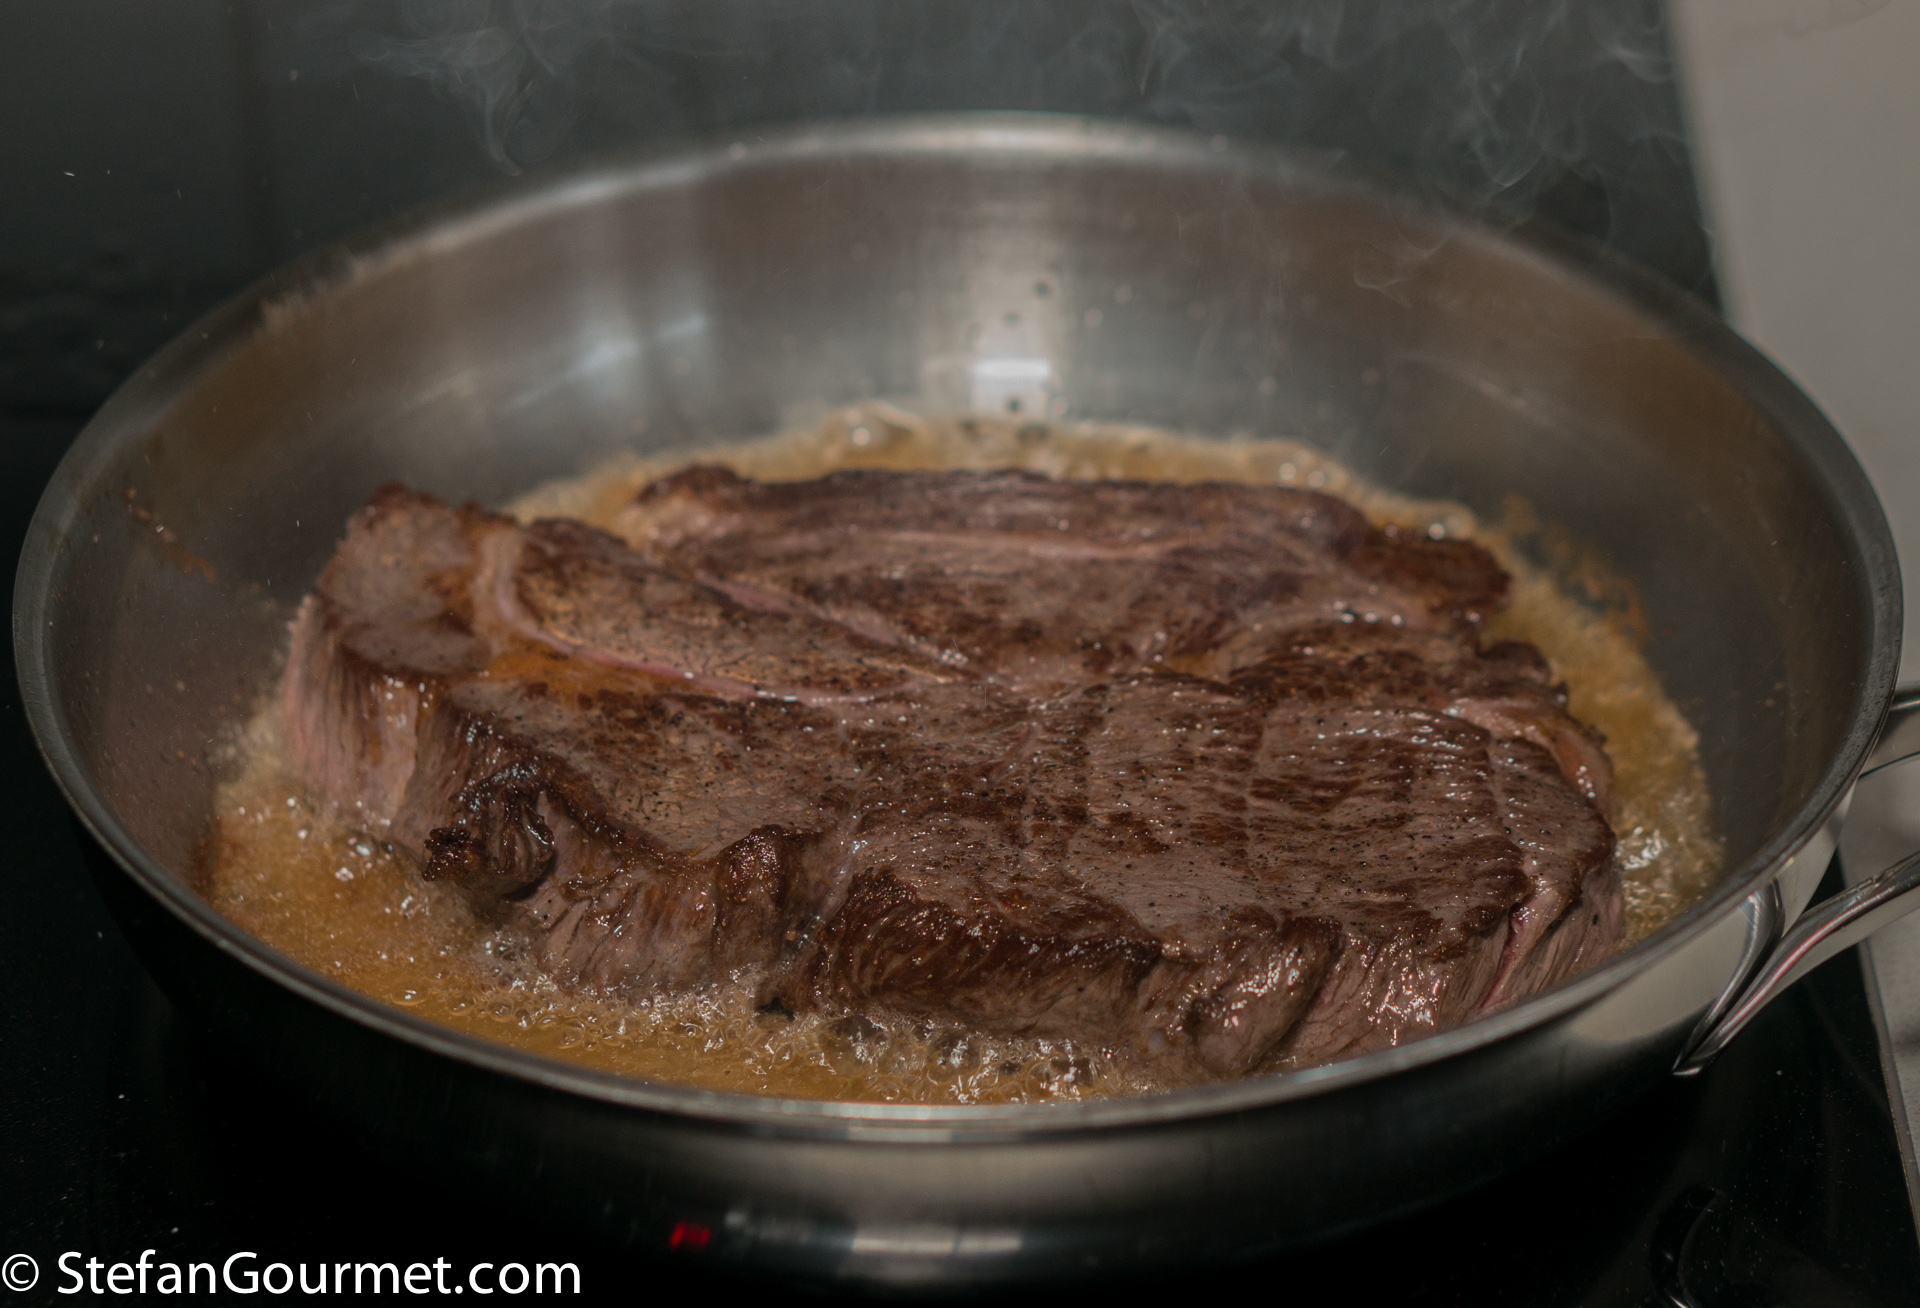
Even if your recipe calls for diced or ground meat, it is best to brown the meat in steaks. If you brown the meat as a steak (or as a whole roast), there is less loss of moisture. This doesn’t only mean that more juices will remain inside the meat where you want them to be, but also that the browning itself is not hindered by the juices that come out of the meat. Browning creates a lot of flavor because of the Maillard reaction. This reaction occurs best if it is dry and hot. Water messes with that, because it reduces the temperature to 100C/212F and of course because it is rather the opposite of dry.
There is a trade off here between texture and flavor. The longer you brown, the thicker the crust and the more flavor that will develop. However, a thicker crust also means a thicker layer of overcooked meat. By browning over high heat in enough fat (oil or clarified butter; regular butter would burn) you can get more browning while overcooking as little meat as possible. Do not turn frequently for the same reason. If you turn frequently, you will get more internal cooking and less browning, and you want the opposite.
Browning the meat in steaks rather than ground or diced has the same purpose. If you brown the meat when it is ground or diced, the advantage of getting a better texture from sous vide will be lost. Also, it will be more difficult to brown the meat, so you may not even get more flavor in return.
In traditional recipes you will keep the meat in the pan after browning and add other ingredients, but for the sous-vide adaptation we are taking the meat out of the pan as soon as the crust is the way you like it. The meat will still be raw on the outside, and that is how it should be, because the sous-vide cooking will take care of that.
Step 2: Make the sauce
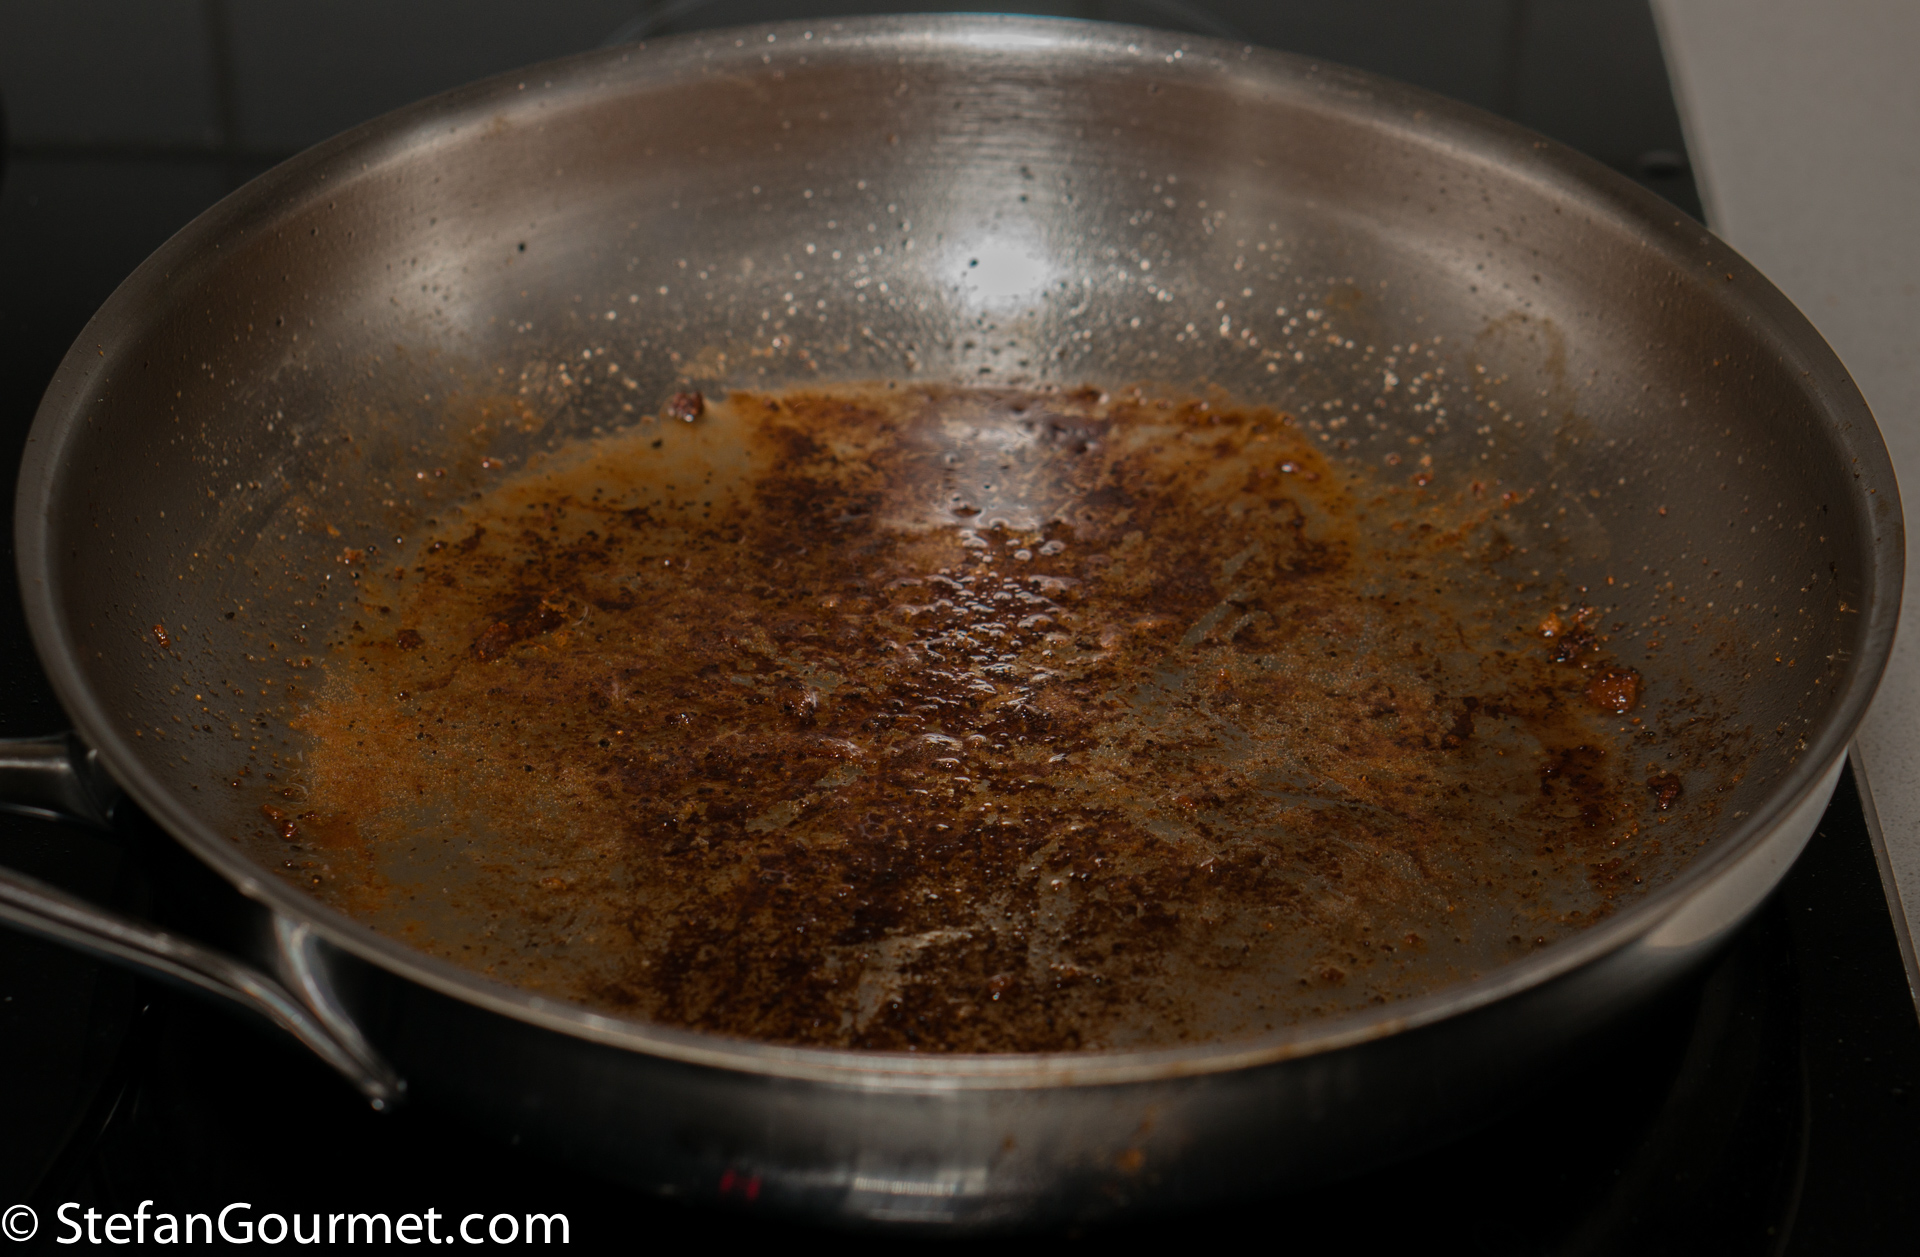
The most important ingredient for your sauce is already in the pan, because it is the drippings that are left behind from browning the meat. So do not clean the pan!
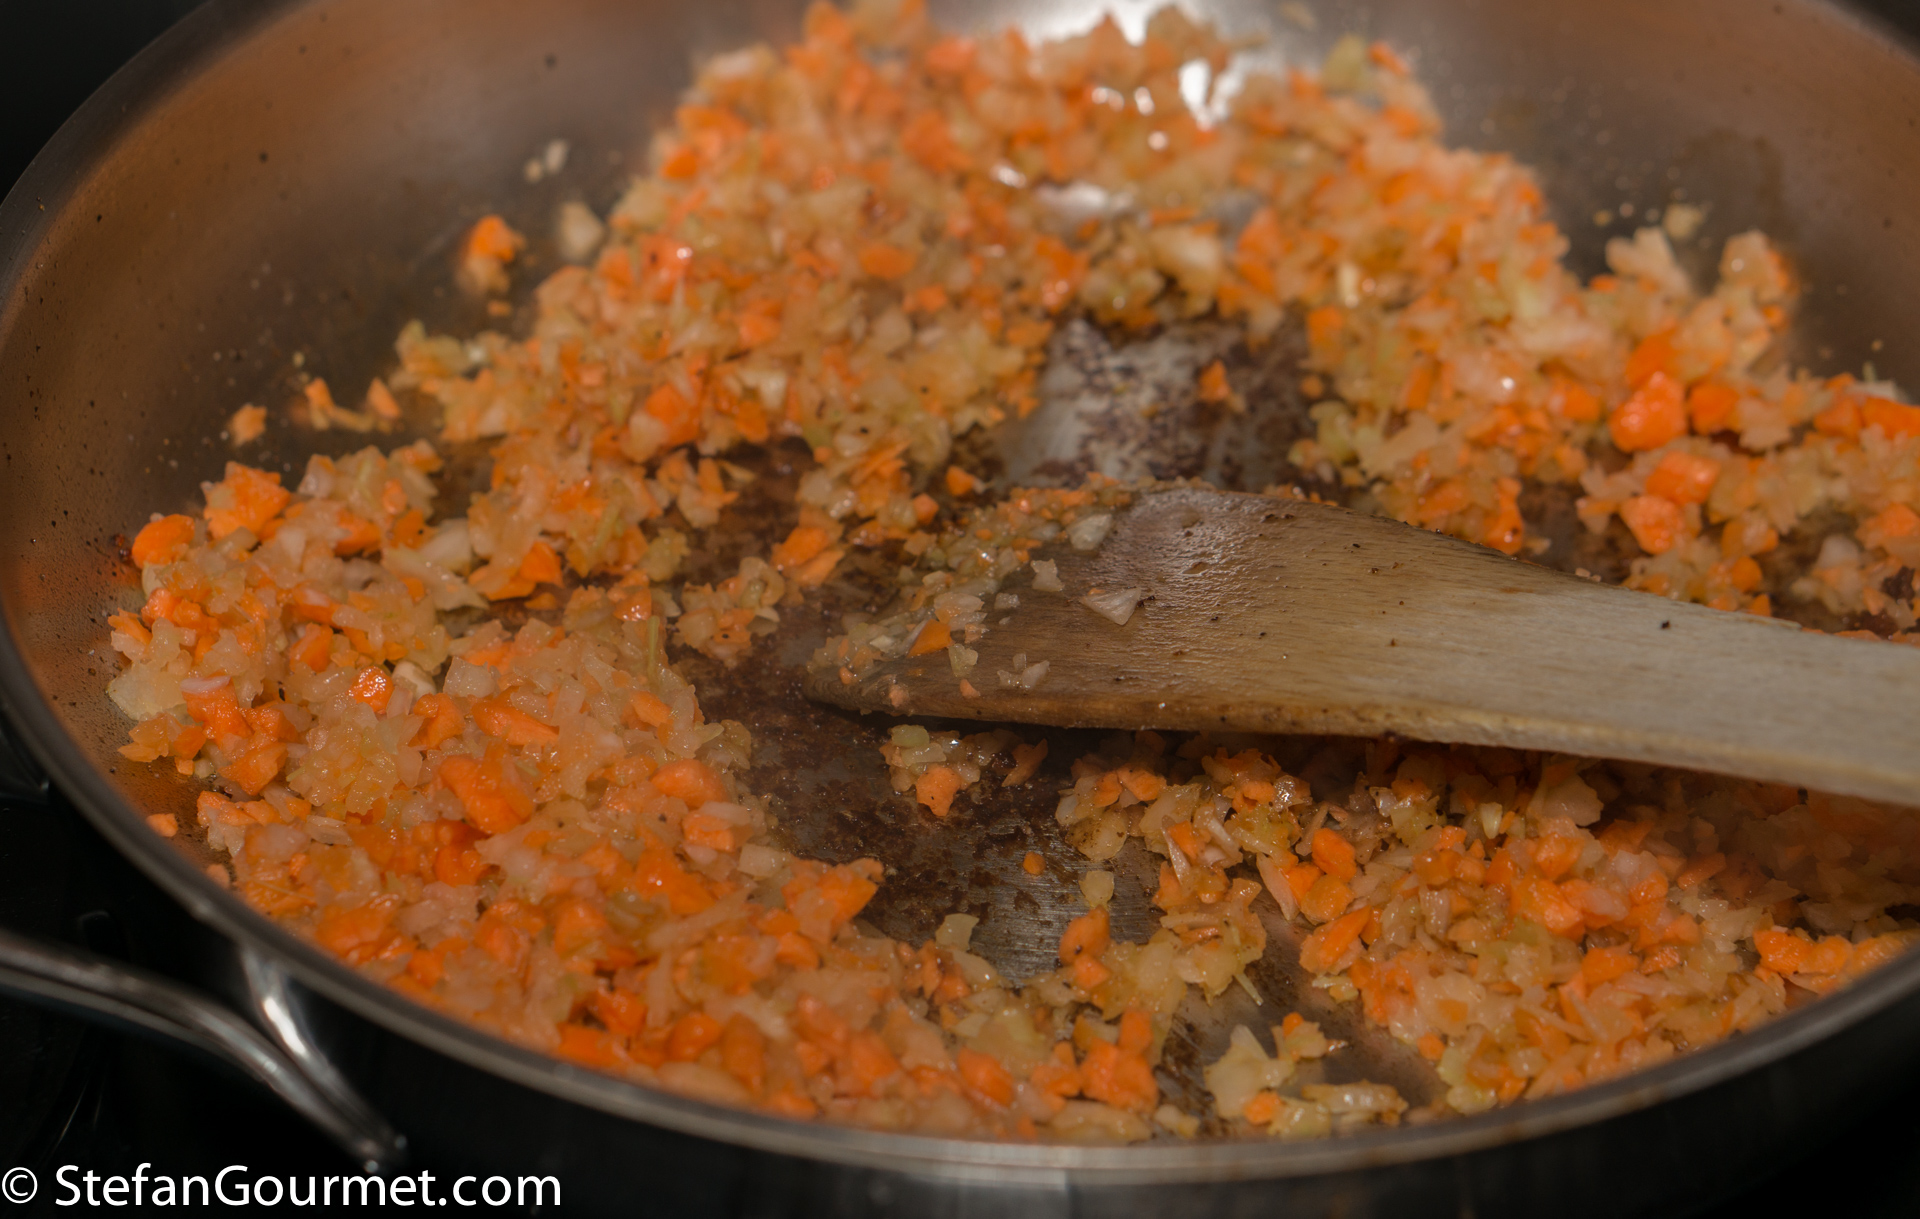
Now add the aromatics to the drippings in the pan. For Italian dishes this is the holy trinity of carrot, onion, and celery. For a curry this would be the curry paste. Stir the aromatics over medium to medium-high heat, making sure that the drippings do not burn. Usually the moisture that will be released by the aromatics will help to prevent that, together with moderating the heat as needed. If needed, deglaze the pan with a bit of water, just to loosen up the drippings. As we want the aromatics to brown as well and get some nice Maillard reaction going, it is however best to keep this step as dry as possible. Italian recipes will actually tell you to let the aromatics dry out in the pan.
Keep going until the aromatics are fully cooked, as the sous vide cooking will happen at a temperature that is too low to cook them. For most recipes you want to cook the aromatics until they are golden.

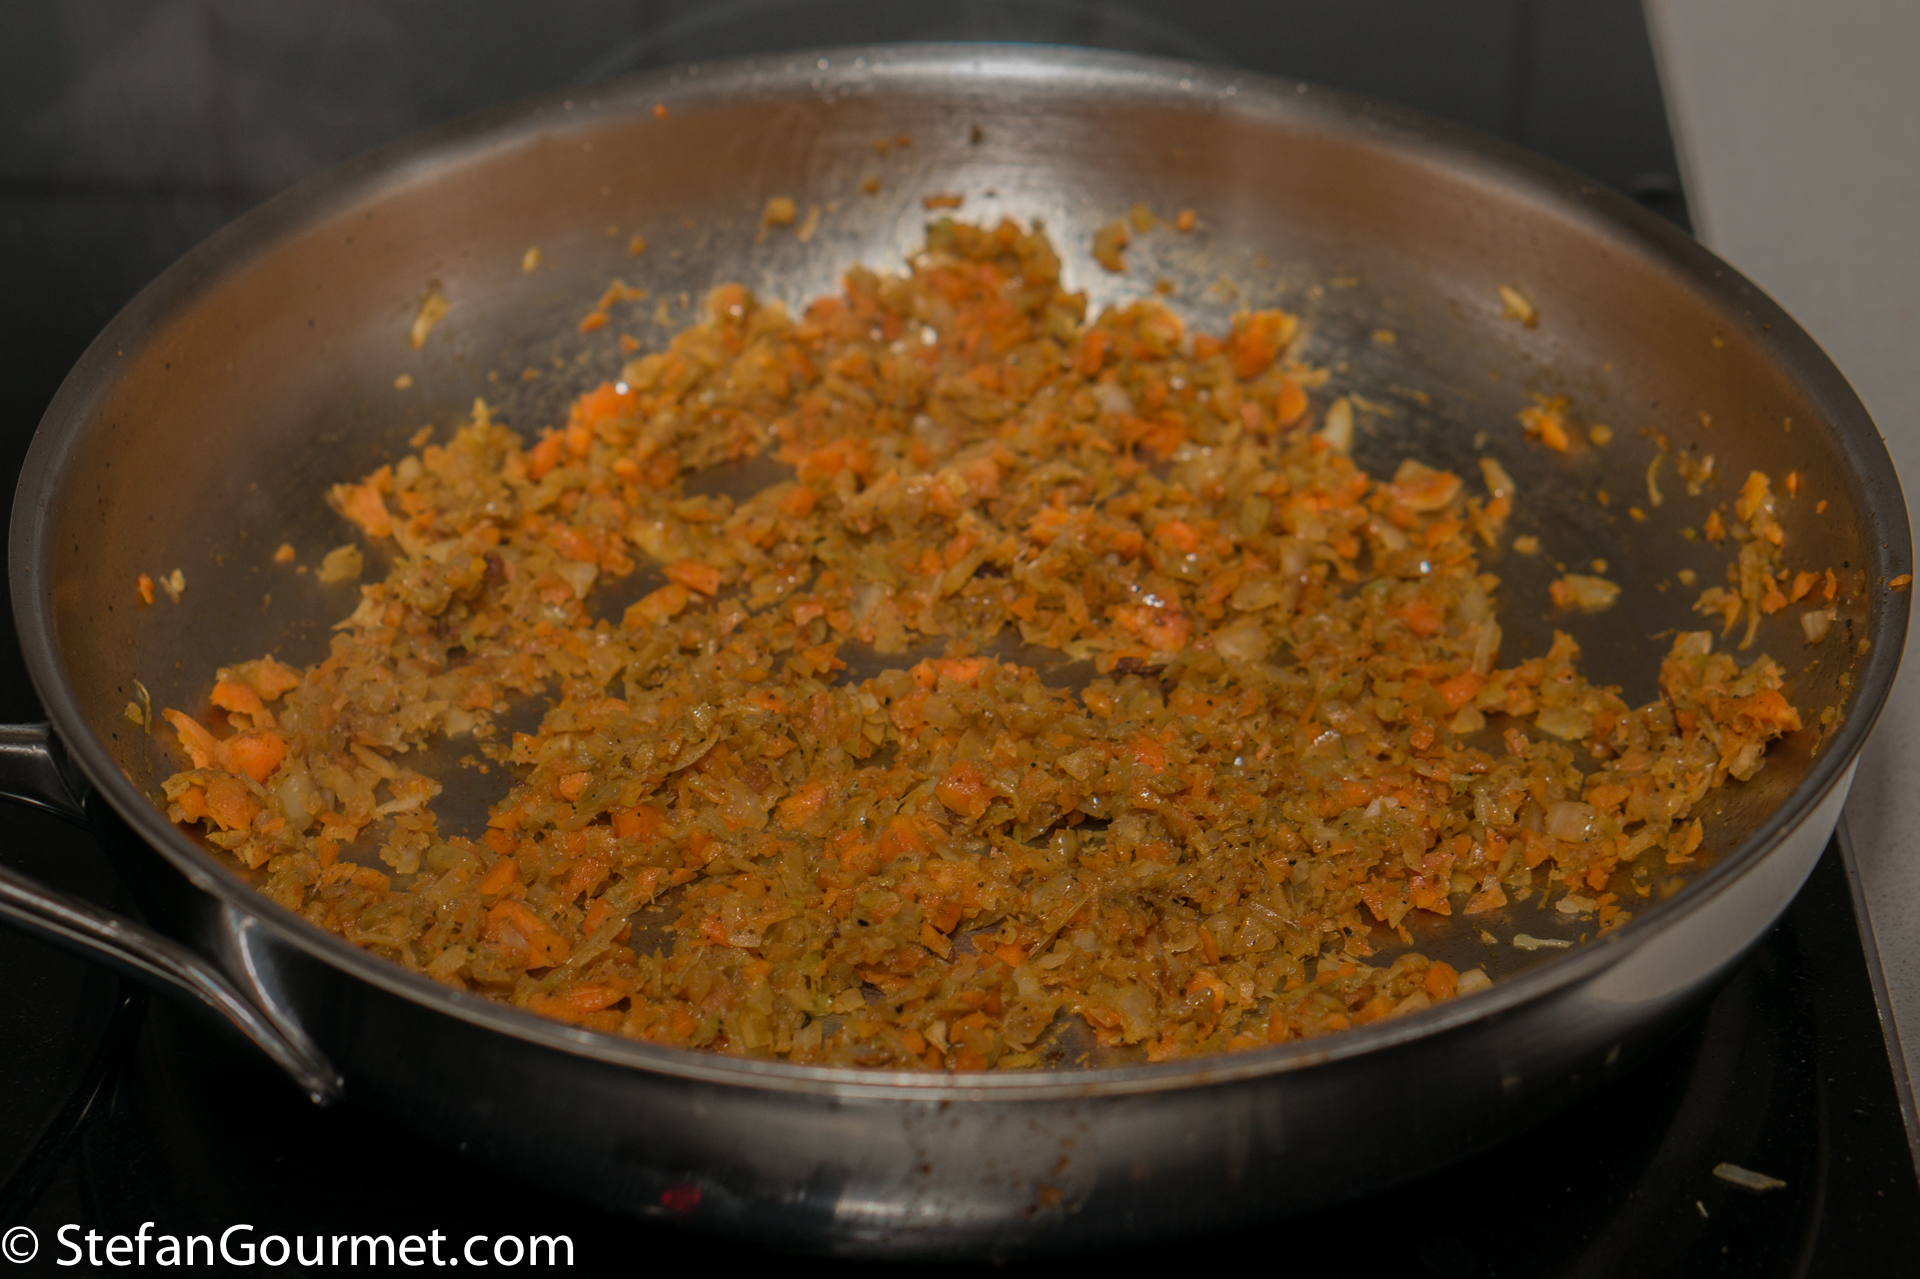
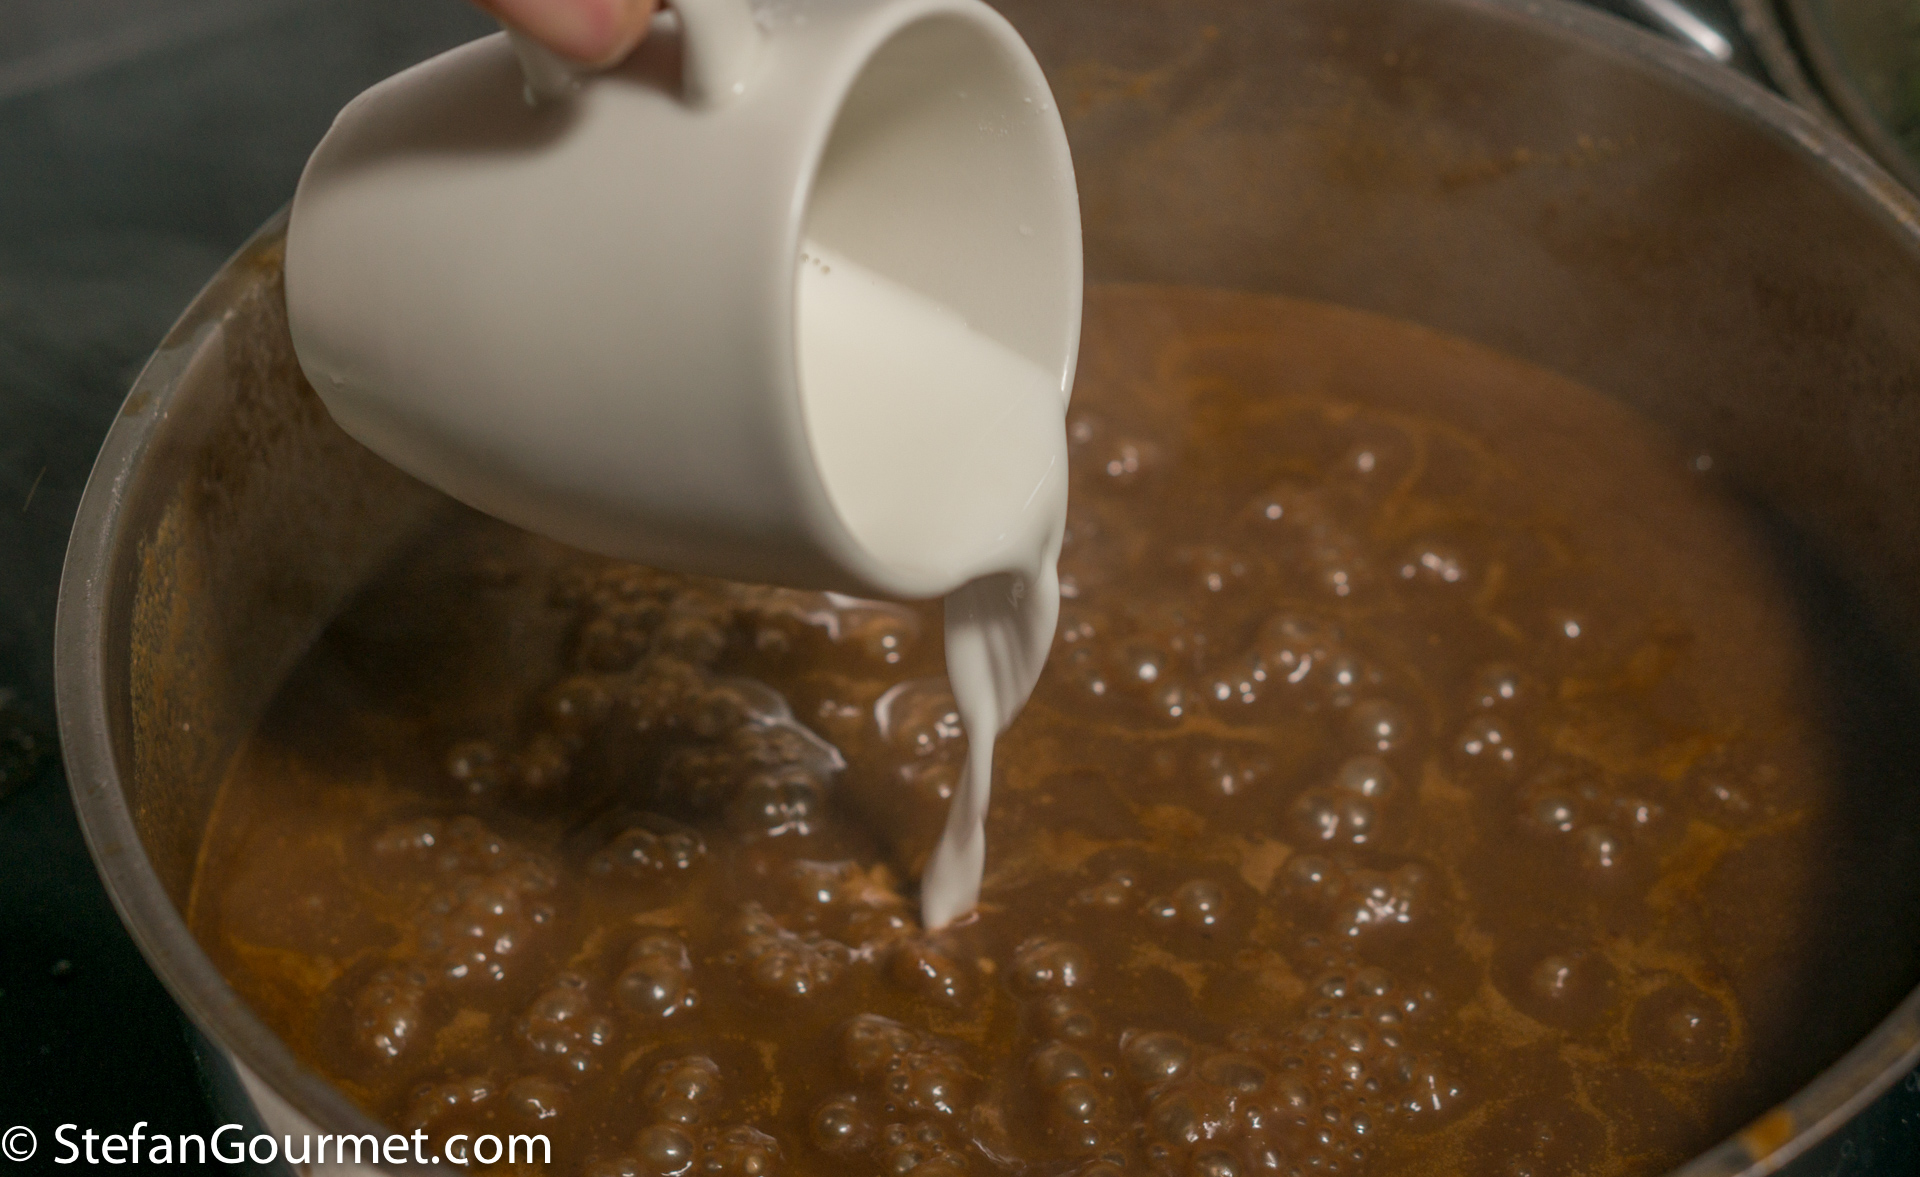
Now it is time to deglaze the pan with wine, stock, and/or sieved tomatoes. I would advise against deglazing with water, as that would dilute the flavor. Even if the recipe calls for water, I would replace it with stock. Use beef stock for a beef dish, chicken stock for a chicken dish, lamb stock for a lamb dish, etc. It is usually best to use stock from the same type of meat. If you were to use beef stock in a pork dish, the dish would end up tasting less like pork.
If deglazing with wine and another liquid, then allow the wine to reduce by half before adding the other liquid. Reducing the wine by half ensures that the alcohol is gone.
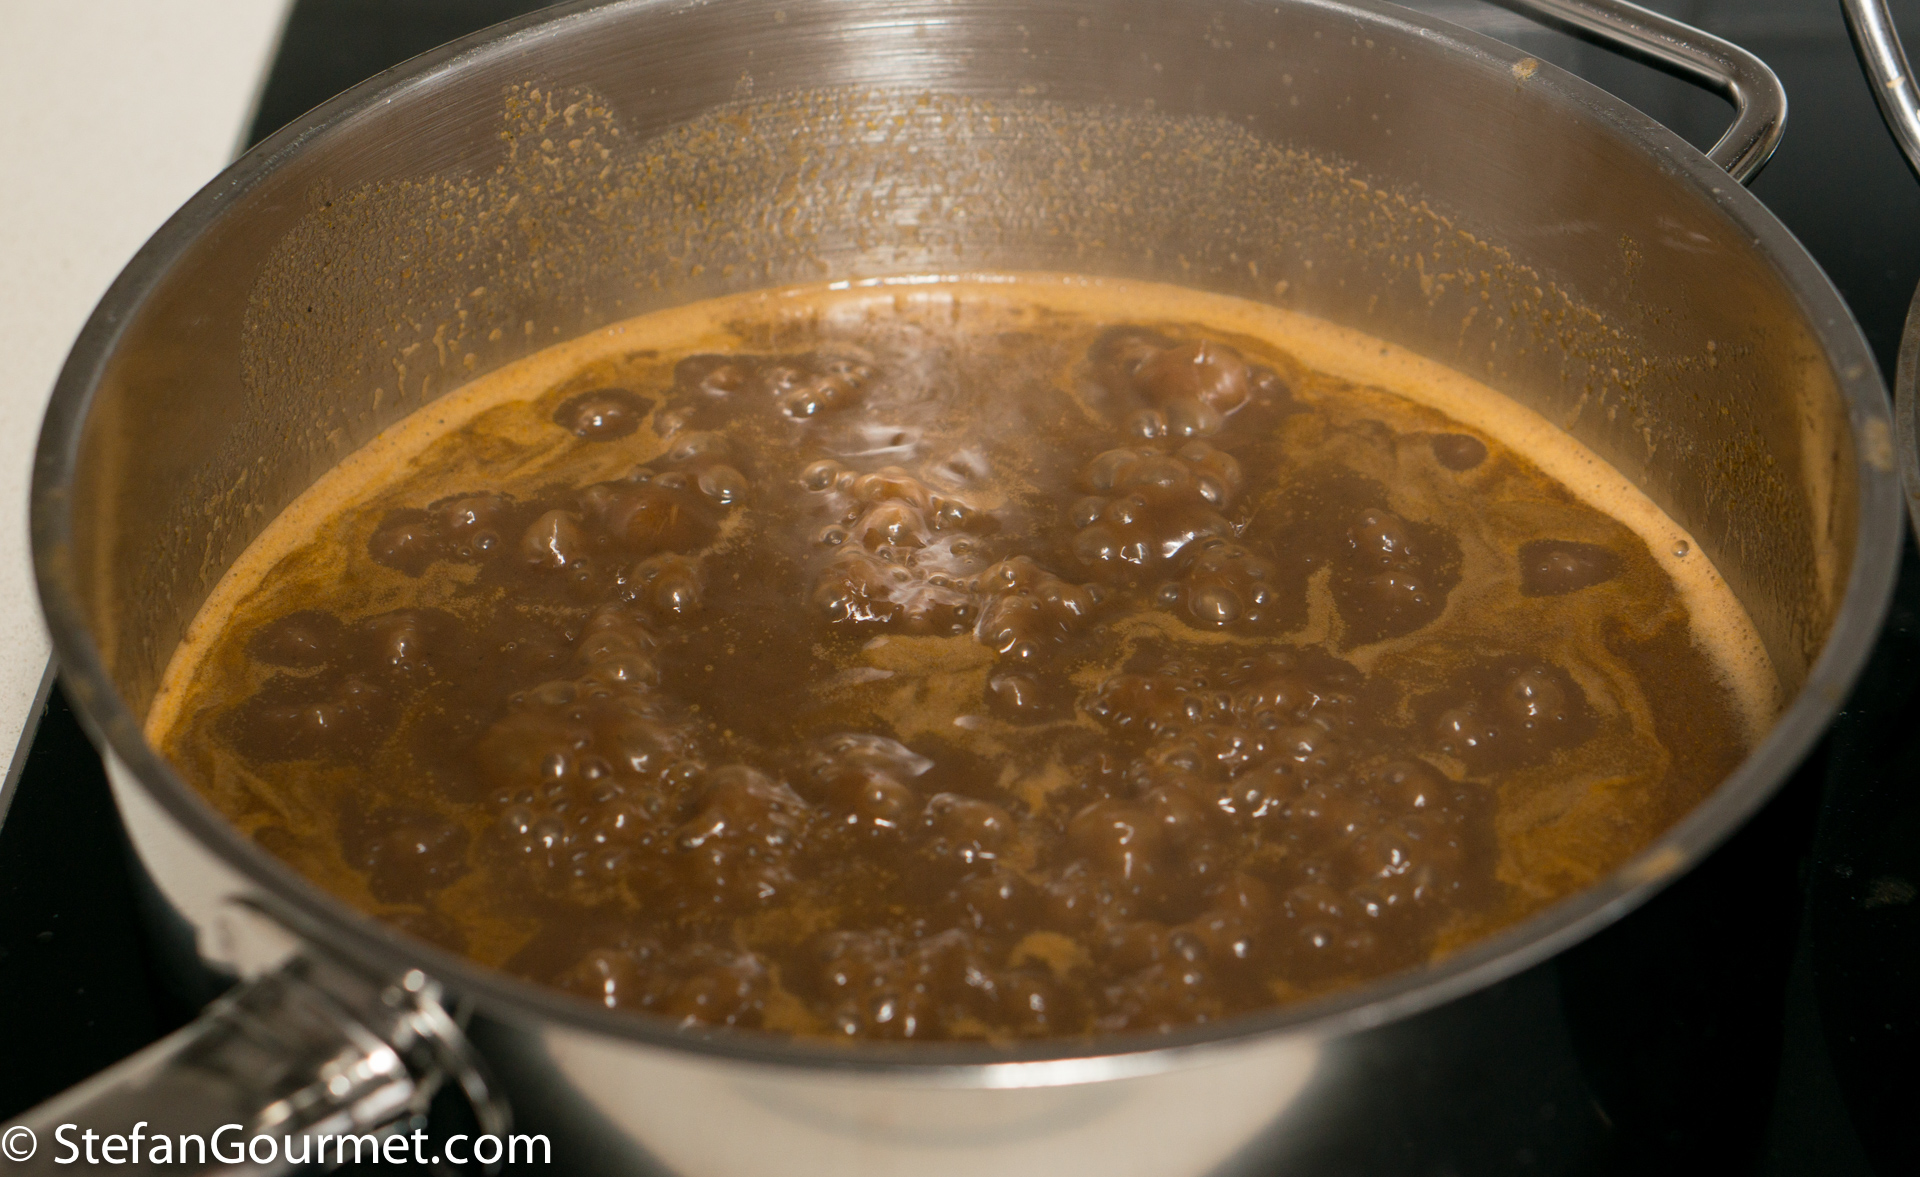
Step 3: Reduce the sauce

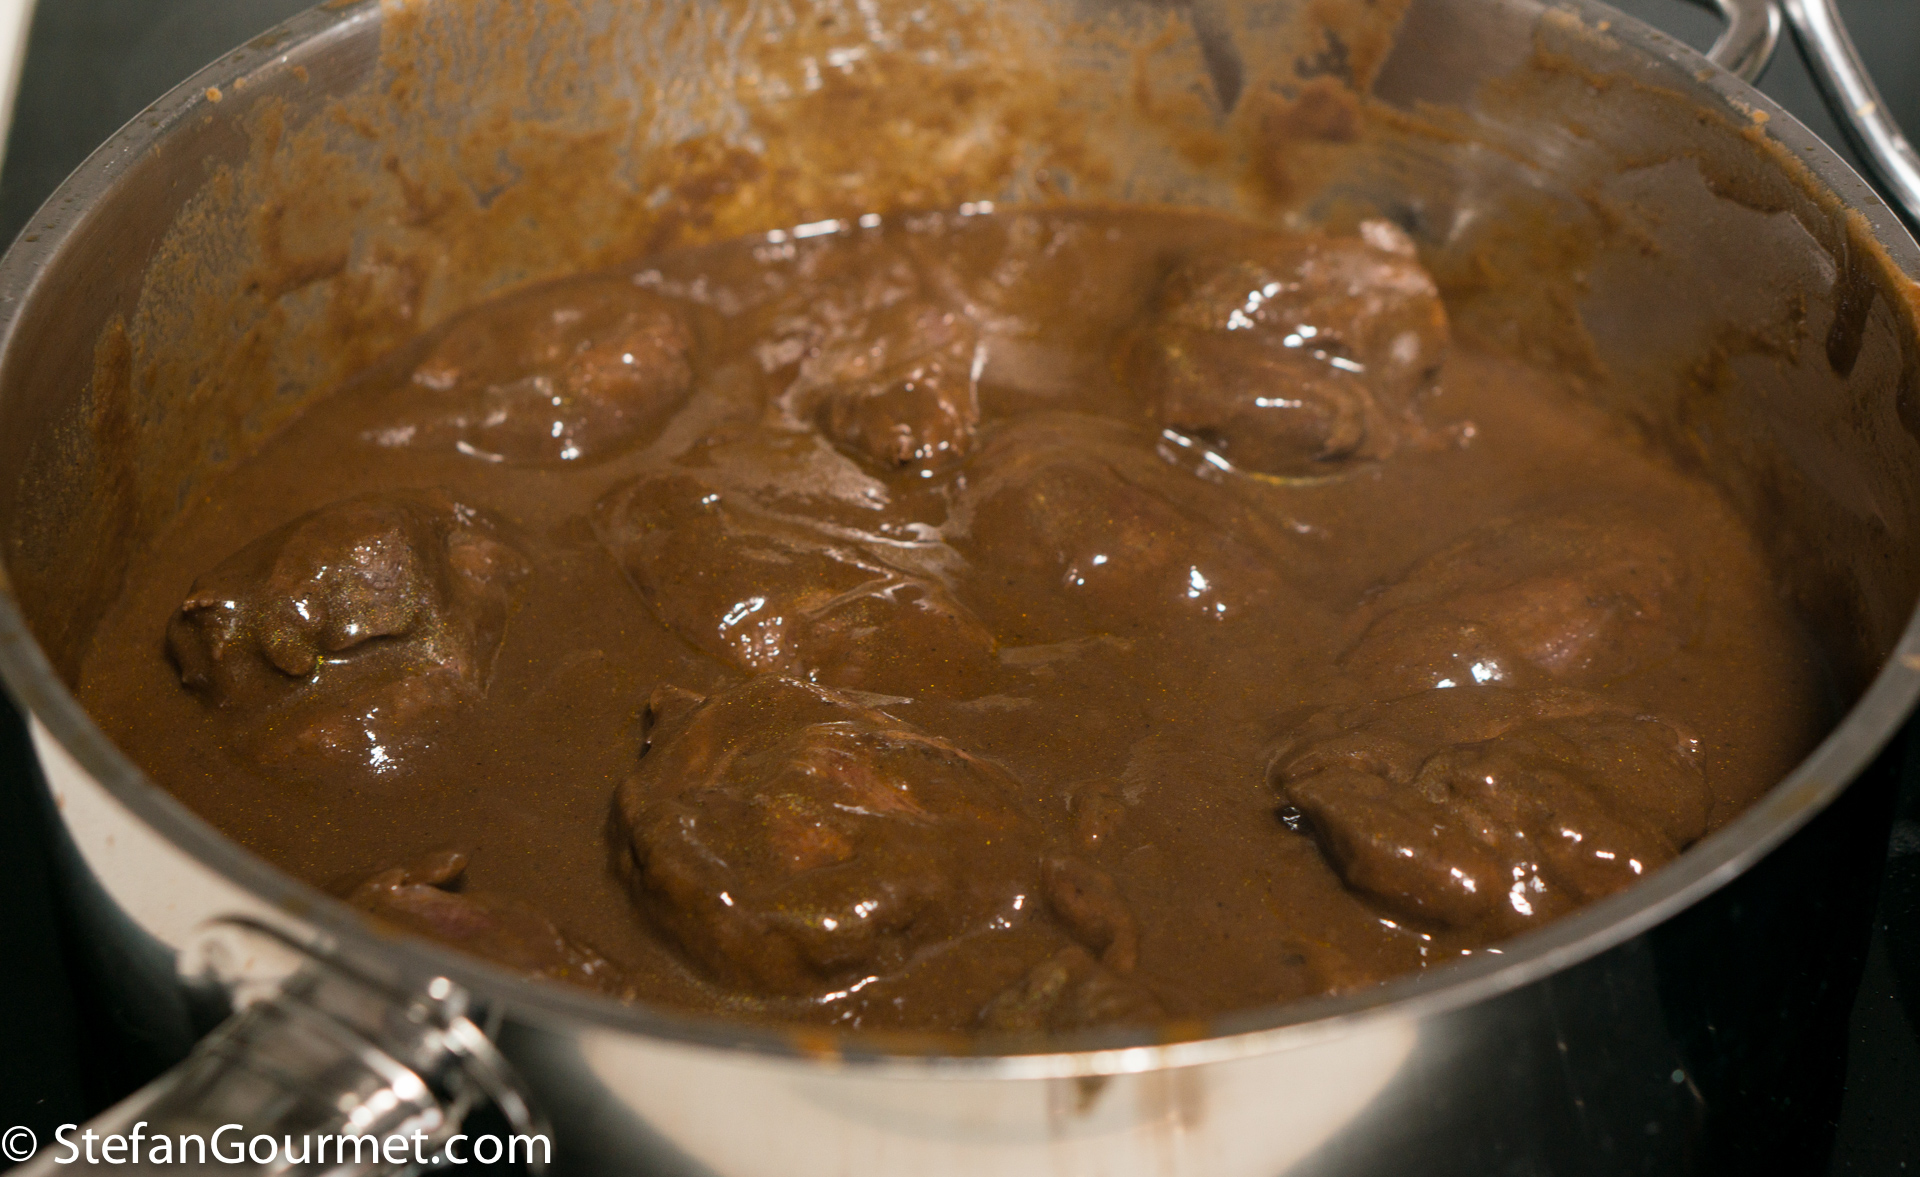
Bring the sauce to a boil, then reduce the heat to a simmer. Stir the sauce once in a while so it won’t scorch at the bottom. Do not stir it too often, because the Maillard reaction will occur at the highest rate just before it scorches. You need to reduce the sauce to even thicker than you’d want it to be in the finished dish, because juices from the meat will be added to it during the sous-vide cooking. If you have the time, reduce with a slow simmer rather than a rolling boil. The slower you reduce, the more flavor will remain in the sauce. It smells really good while you are reducing, but that is not a good thing. Every flavor compound you smell during the simmer means that flavor compound is no longer in the dish.
Step 4 (optional): cube or grind the meat
Some braised dishes like Brasato al Barolo or Genovese alla Napoletana are braised as a whole roast and then sliced before serving. But for many stews like Chili or Spezzatino or pasta sauces like Ragù alla Bolognese the meat is cubed or ground. For convenience meat is often sold already cubed or ground. But as already explained in Step 1, it is best to brown the meat in steaks and only cube or grind them afterwards. The meat will still be raw on the inside, because only the outside has been seared.
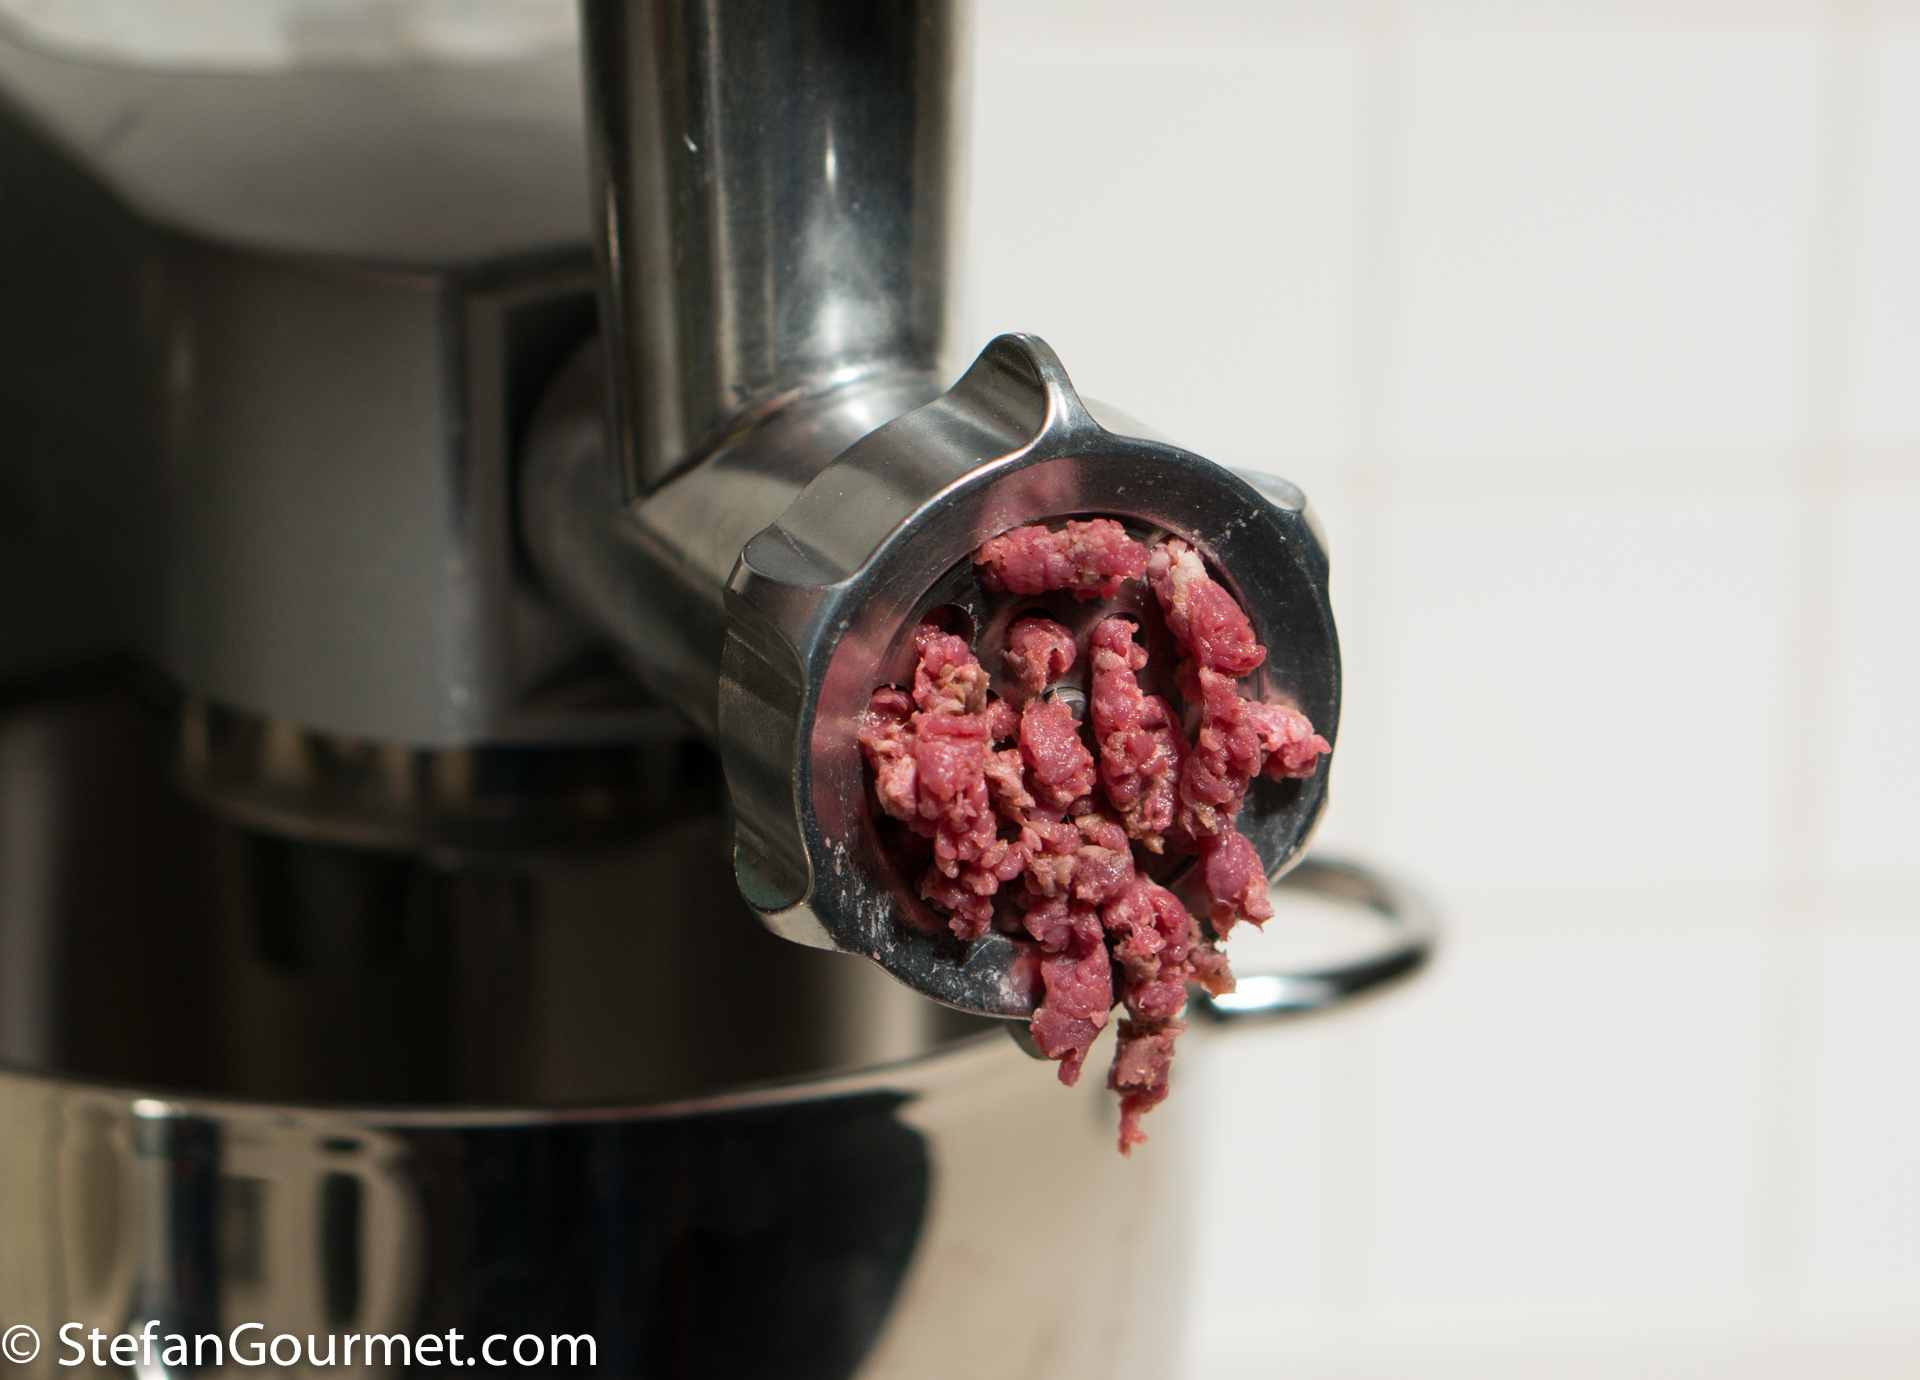
Make sure the meat is well chilled before you grind it. If you don’t own a meat grinder, an alternative solution is to purchase ground meat and brown only 10% or 20% of it, and add the rest raw.
Step 5: Vacuum seal
Mix the meat with the sauce (making sure the sauce is not warmer than the temperature you intend to cook sous vide at) and vacuum seal it. You have three options for doing this.
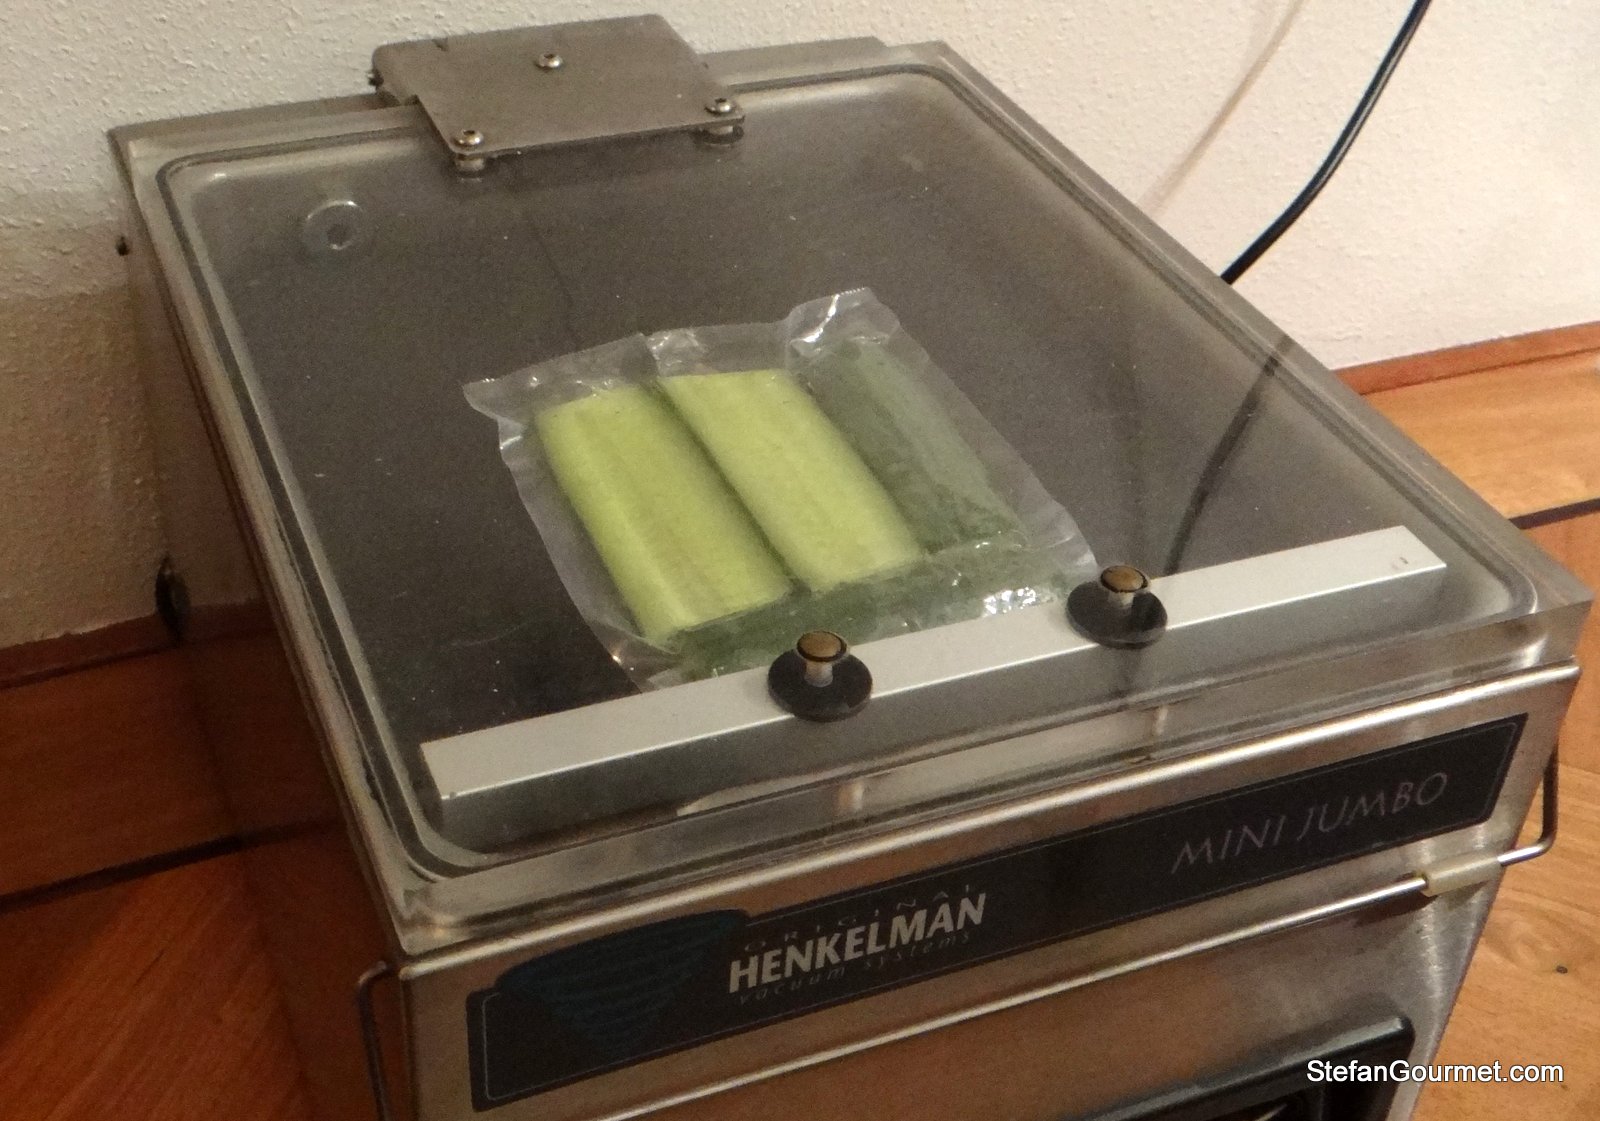
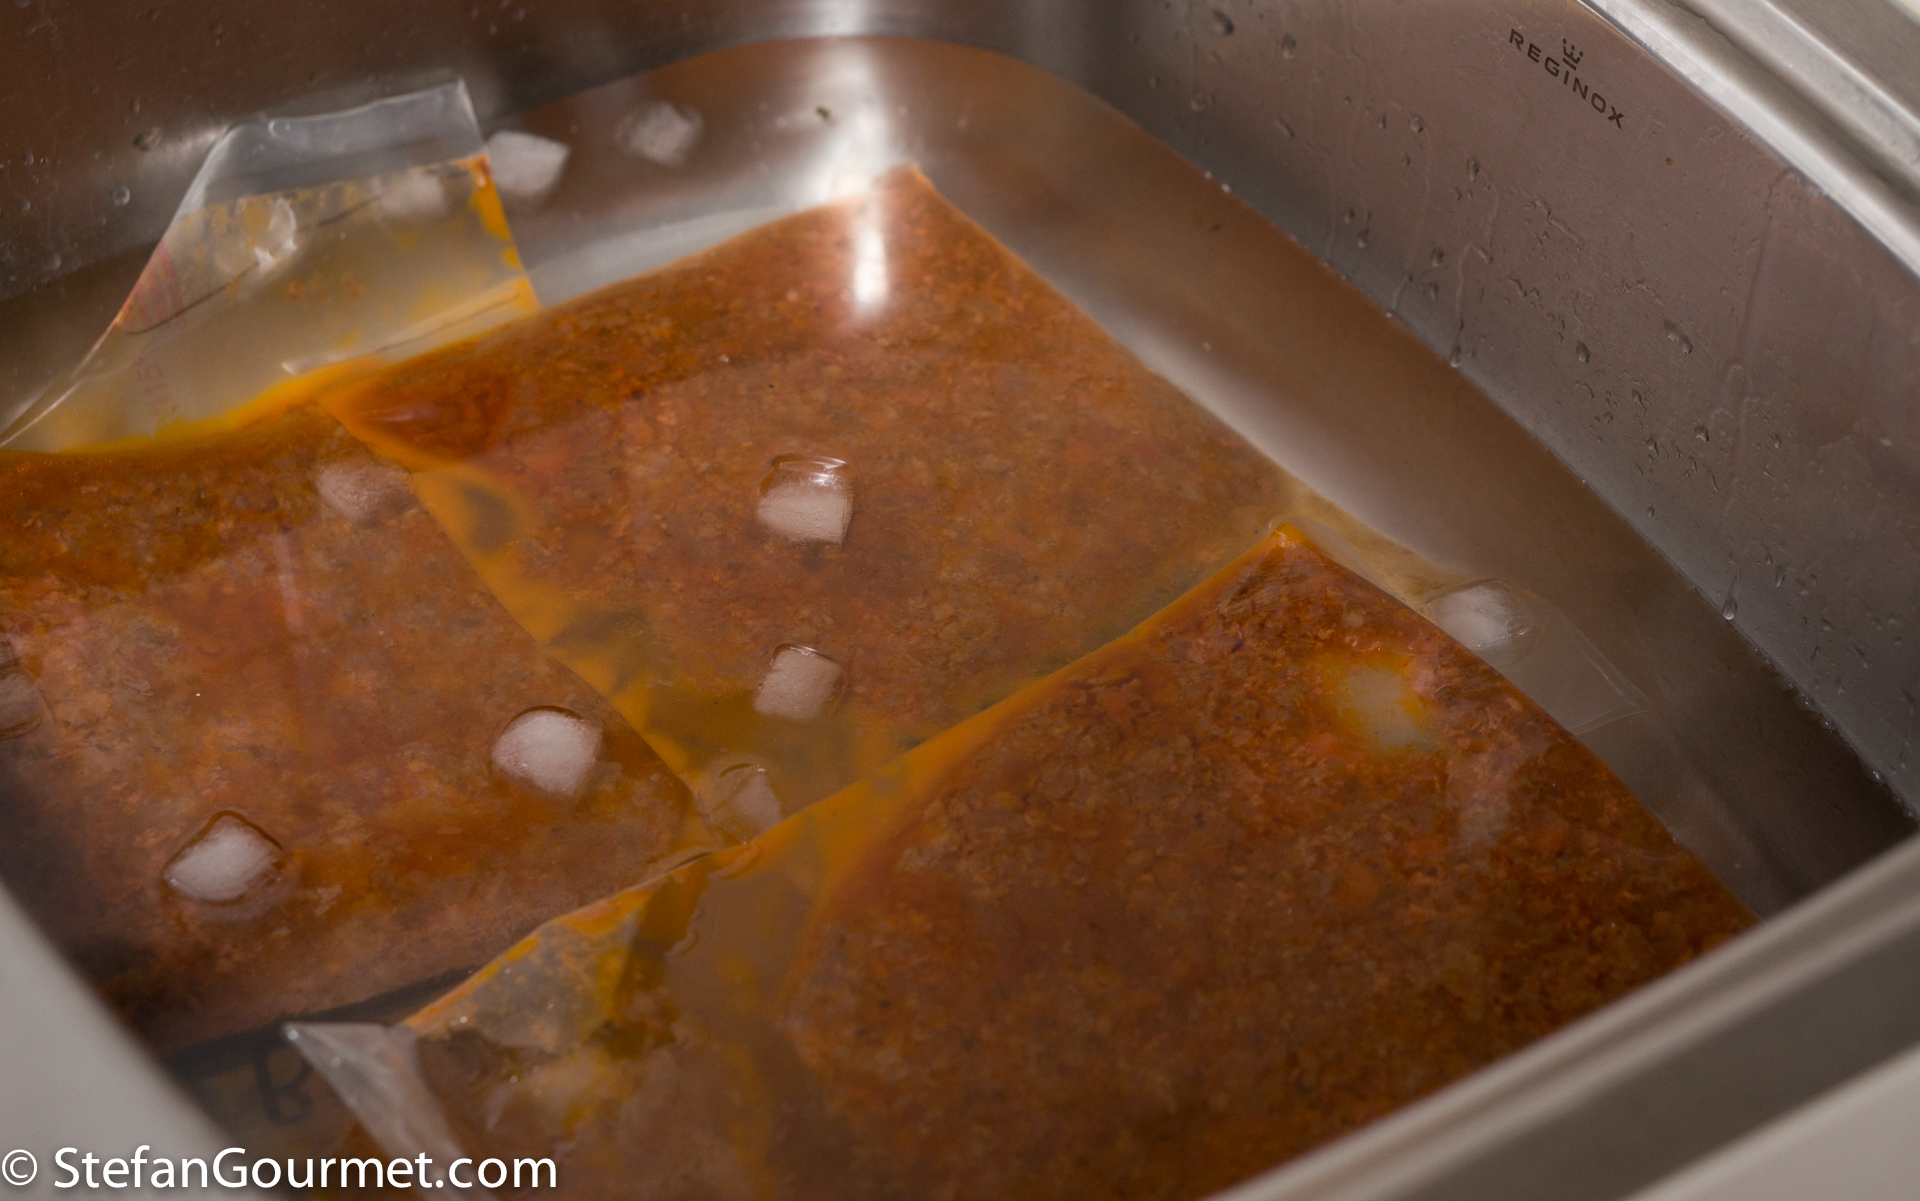
Option 1: use a chamber vacuum sealer. Chamber vacuum sealers are great at vacuum sealing liquids. The sauce and the meat must be completely chilled before vacuum sealing, because otherwise the water in the sauce and meat will come to a boil. This is because the boiling point of water is lower at a lower pressure.
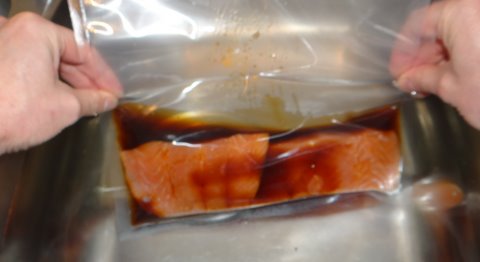
Option 2: use a ziploc bag and the water displacement method. You can do this while meat and sauce are still warm.

Option 3: freeze the sauce, and vacuum seal with an external vacuum sealer.
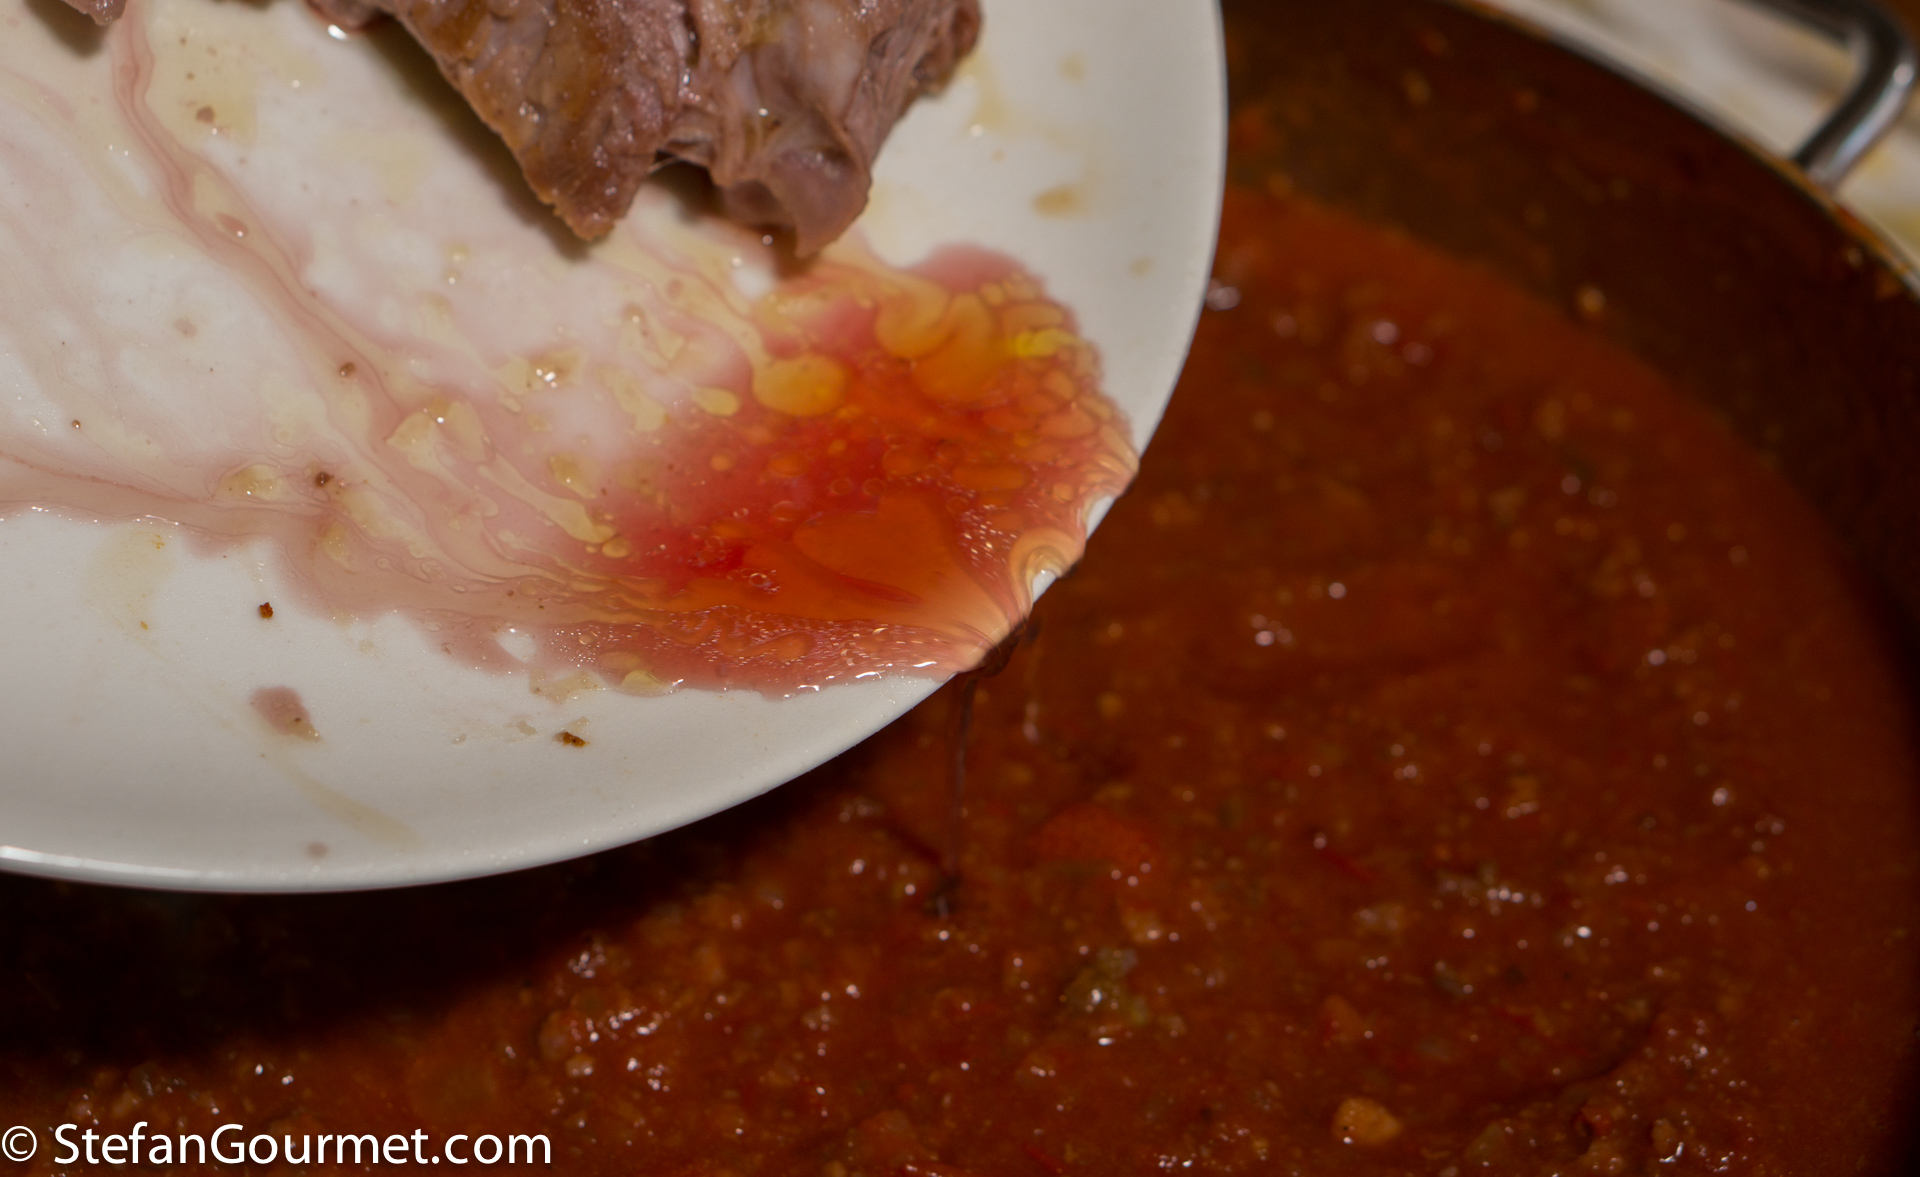
Make sure to include any juices that leaked out of the browned meat to the sauce before vacuum sealing, as we don’t want to waste any flavor.
Step 6: cook meat and sauce together sous vide
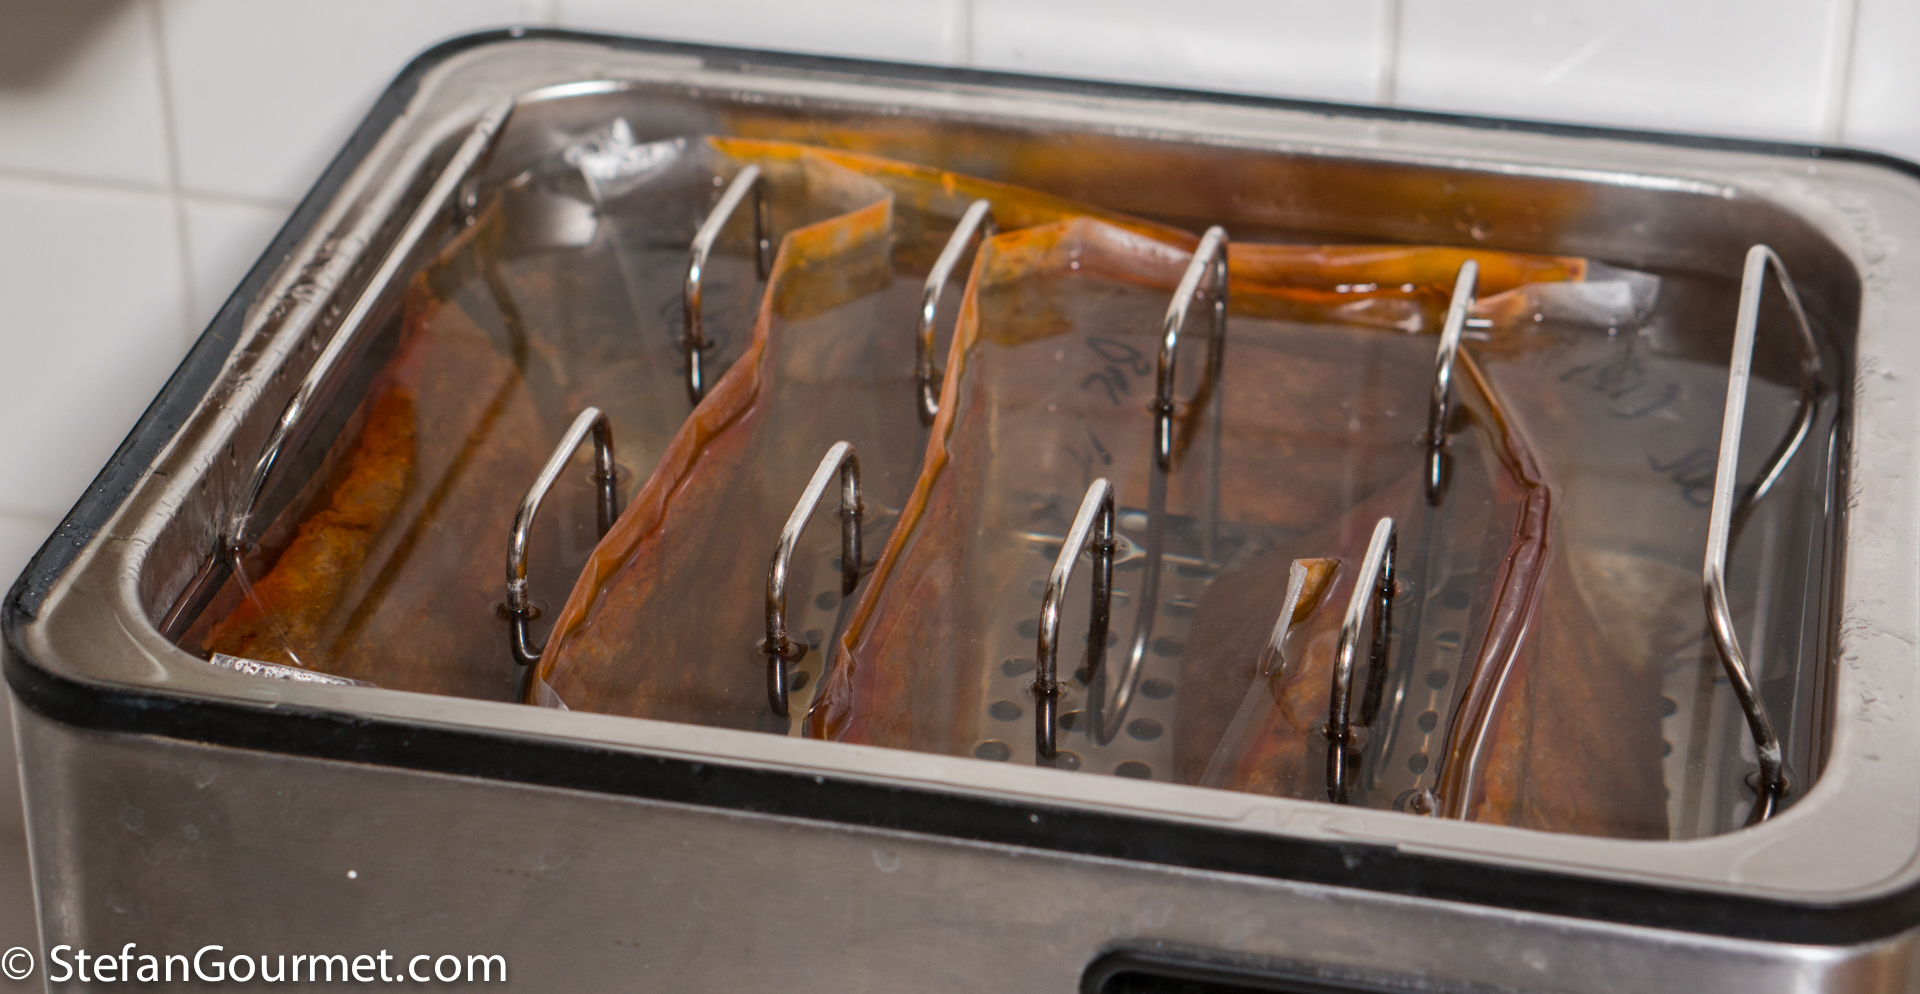
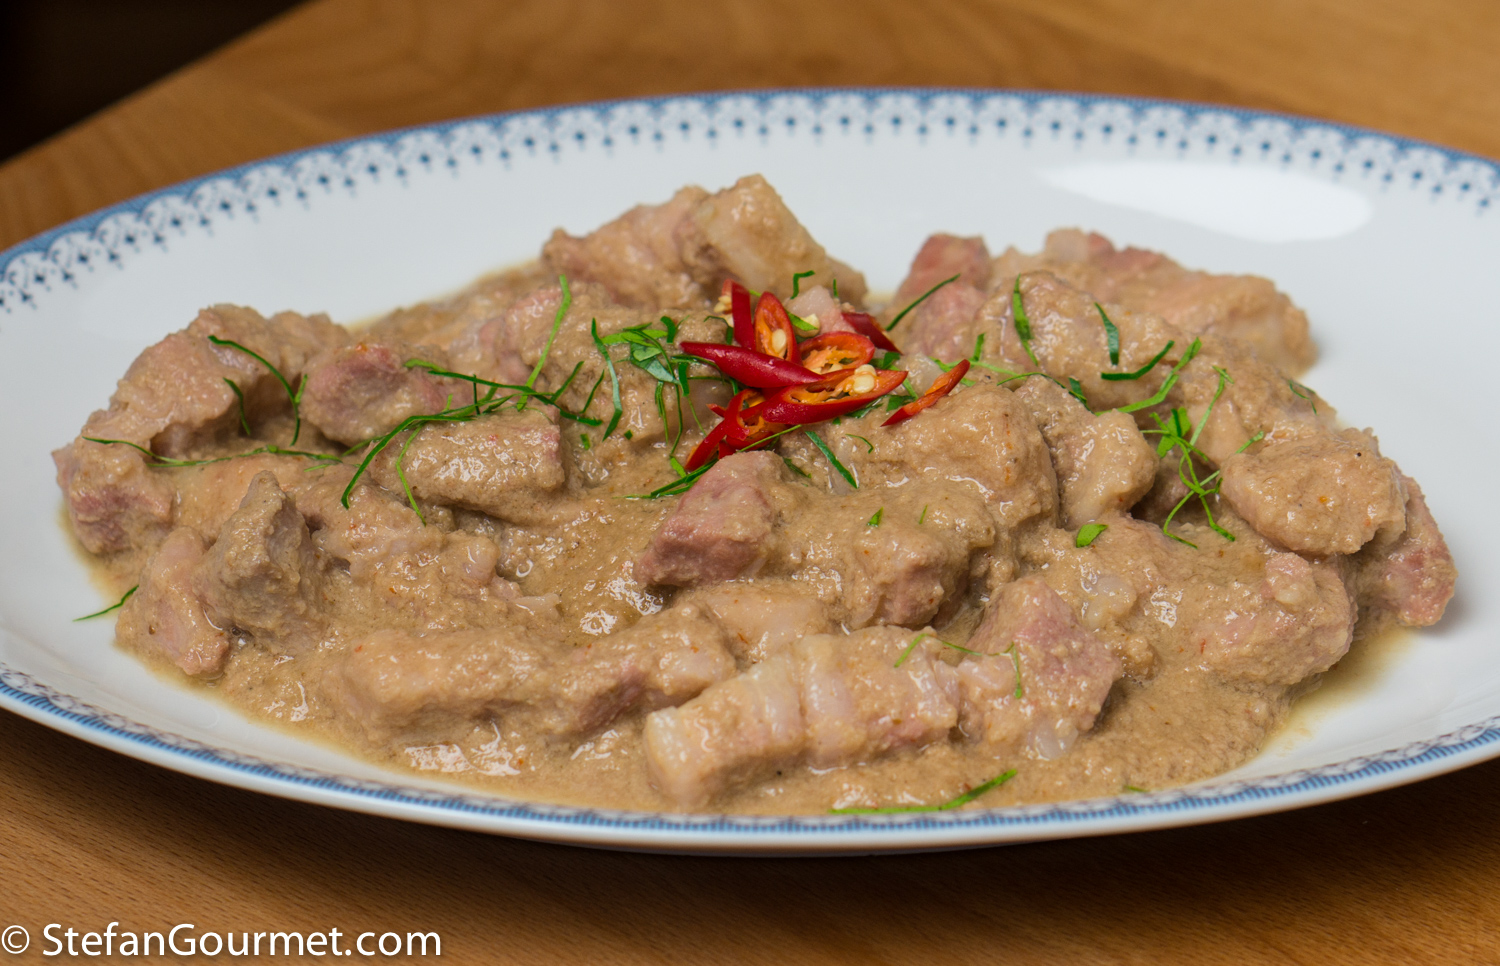
To cook the meat and sauce sous vide, you have the option to select a time and temperature that will give a classic flaky tender braised texture to the meat, such as 24 hours at 74C/165F, or tender and juicy medium rare, such as 24-96 hours at 55C/131F, 57C/135F, or 60C/140F. The time and temperature for tender and juicy medium rare will depend on the type of meat. For a classic flaky texture, 24 hours at 74C/165F works for many types of meat.
The long cooking time will also allow the flavors to blend.
Step 7: finish and serve
You can serve straight from the bag. Just make sure the plates or bowls are preheated, especially if you cooked sous vide at a low temperature.
For a higher serving temperature and the opportunity to thicken the sauce, you can follow these steps.

First, strain the sauce into a pan, reserving the meat.
Bring the sauce to a boil.
If needed, you can thicken with a slurry of cornstarch and water, or arrowroot and water, or with butter (turn off the heat and whisk in small pieces of cold water), or with beurre manié (equal parts of butter and flour mixed into a paste, whisked into the sauce after the heat has been turned off).

An optional step is to ‘pull’ the meat with two forks. This is a great way to make meat that turned out a bit dry seem very juicy, because the strands of meat will be coated with the sauce.
Turn off the heat and add the reserved meat. Stir to coat the meat with the sauce. Taste and adjust the seasoning with salt and pepper if needed. It is now ready to be served.
Why prepare a stew or braised dish sous-vide?
Sous-vide is not the solution to everything, and you can make a perfectly good stew or braised dish without it. But there are some reasons for doing this sous-vide:
- Consistency and precision. With traditional methods there is a higher risk of dry or tough meat because the temperature got too high.
- Convenience, as you don’t have to tend a pot on the stovetop for a long time.
- Less liquid required to cover the meat and no need to stir during cooking (except for reducing the sauce).
- Turn tough meat into tender and juicy medium rare (at 60℃/140℉ or lower), an option you do not have with traditional methods for making stews or braised dishes.
- Easy to chill, store & reheat to serve.
If you vacuum seal individual portions, like the Ragù alla Bolognese in the photo, they will be pasteurized and can be chilled quickly in an ice bath and then chilled or frozen. You can reheat at the same temperature as you cooked sous-vide. If the bags are not thick, half an hour will be enough from thawed or an hour from frozen. Compare this to making a large pot of ragù the traditional way. You would have to chill the ragù before you could pack and freeze it, which will take long and it will no longer be pasteurized.
But if you are happy with preparing stews or braised dishes the traditional way on the stovetop or in the oven and you are not interested in obtaining a tender and juicy medium rare texture, then by all means keep doing what you’re doing.


Sadly, I am unsubscribing to your website because of your constant emphasis on sous vide.
LikeLike
Learn how to sous vide and you’ll subscribe.
LikeLiked by 1 person
Very interesting topic. Clear explanations to adapt a numbers of renowned recipes and bring them to a higher level. Imagine you can prepare the main meal ahead and make it ready at your convenience. Thank you
LikeLiked by 1 person
Thank you ! I am happy that the Sous Vide Summit and your part in it went well. . That said I do not have the need with my life style nor the interest in cooking myself in this manner. But I am always eager to learn 🙂 !
LikeLiked by 1 person
Stefan – just a question – will your part in the Summit ever be available for ‘outsiders’ for a look-and-see or is that part of a commercial package ? best Eha
LikeLike
nice piece of work Stef… these days I only use sous-vide for yogurt and the occasional creme brûlée, because I eat little meat and I find it a tad boring as a cooking method… but this kind of post are very useful. stefano
LikeLiked by 1 person
Hi Stefan,
I hope you are doing well. I just started using sous vide a couple of years ago. I use it mainly to cook steaks, eggs and some desserts. Making stews using sous vide really got my attention. I know cooking sous vide can give a more concentrated flavor which is good for stews. Can i ask you a couple of questions regarding the cooking time and temp as well as reheating methods.
Im very curious about the cooking the stew meat medium rare, the range you gave is quite wide. If i want to cook it at 135F, the time range you gave is from 24-96hours.
If i want to use beef short ribs, how many hours should it be?
For brisket or chuck roast what will the time be?
Another thing, if i want my relatives to try the sous vide (medium rare) stews what is the best way to reheat them if they dont have a sous vide machine without overcooking the meat?
Thanks stefan for listening i hope you have time to reply. Always stay safe.
Jimmy
LikeLike
Hi Jimmy,
For beef short ribs, the time to get them tender at 135F is 2 days/48 hours. You can find cooking times for various types of meat by searching my blog.
Brisket is also 2 days. Chuck is hard to say, because the toughness can vary a lot. Probably also 2 days.
If they don’t have a sous vide machine, the easiest way is to bring a large pot of water to a boil, then turn off the heat, and submerge the bag with the stew in the hot water. Keep it in there for about 15 minutes (this will work if the bag with the stew is about 1 inch thick). Meat on the outside may not remain completely medium rare. An alternative that requires more effort is to use a thermometer with a pot of water on the stove. Heat the water to 130-135F, monitor the temperature to keep it within that range, and put the bag in there for about 30 minutes. This will take longer, because the temperature difference is smaller, but this way it is guaranteed to stay medium rare.
Best regards,
Stefan
LikeLike
Thanks Stefan for replying, i can’t wait to test the times as well as the reheating method. Stay safe Stefan
LikeLiked by 1 person